Lately, I’ve been noticing a lot of rustic wooden trough centerpieces in the home decorating world. And they look gorgeous! Neutrals and rustic are my favorite lately! I mean, I DO love color, but how easy is it to change your accent colors now and then when you’ve decorated in neutrals?! This means that I can re-decorate for holidays and different seasons without it costing me much at all: swap out couch pillows, decorate the mantel, get seasonal plants, and more!
When I first saw the rustic trough centerpiece in a magazine, I immediately thought how fun it would be to put different things in it for different times of the year: ornaments


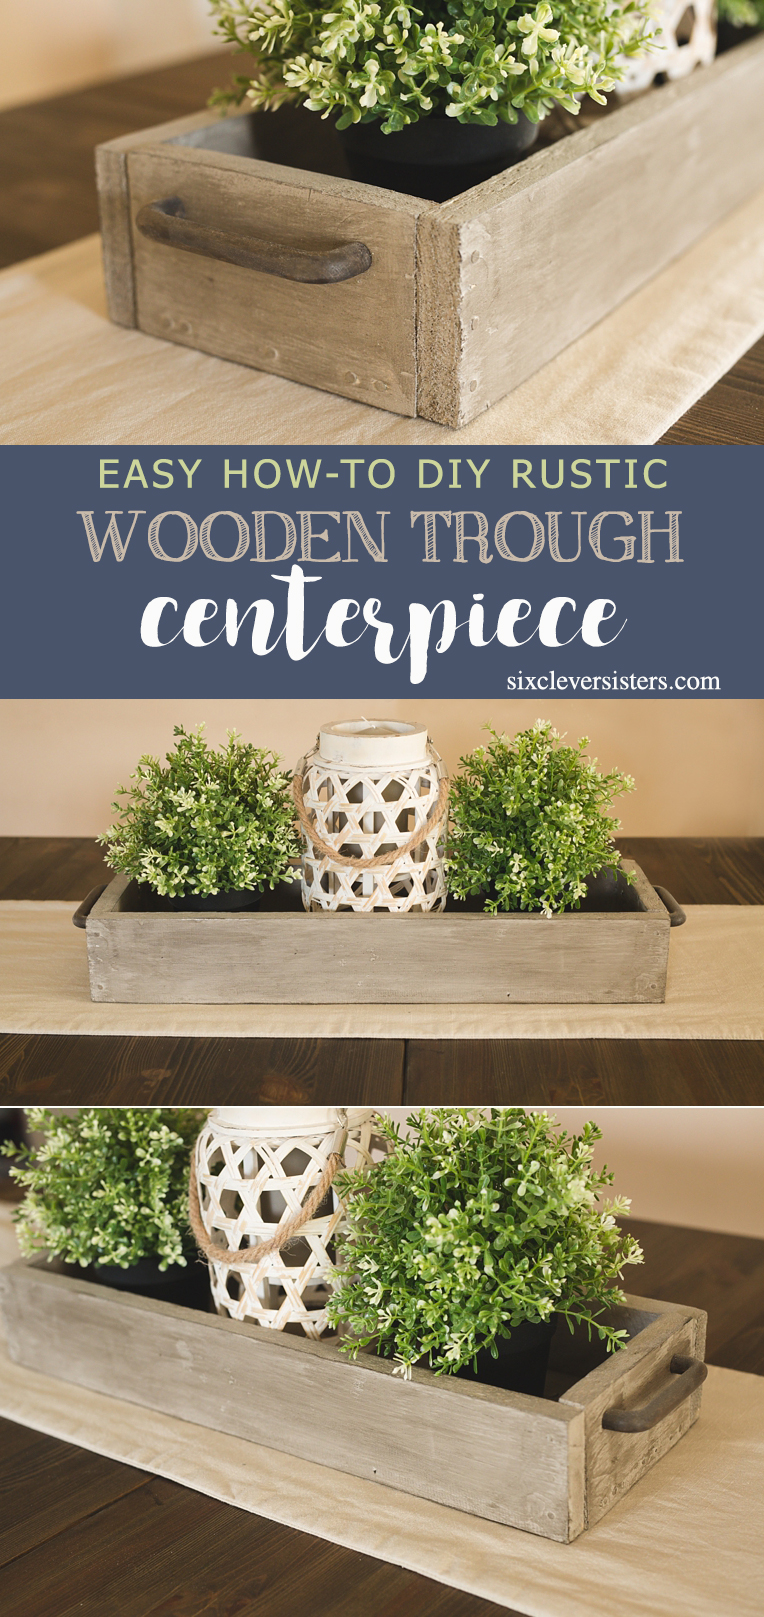
DIY Rustic Wooden Trough Centerpiece
1. Sanding
The key to getting a rustic look on a wood piece is to start with rougher wood and to leave the edges rough instead of sanding it down smoothly. You want that texture and roughness because that’s where the beauty will shine when we get to step 3. For my rustic wooden trough centerpiece, I used some scrap wood I had. I simply cut the sides to the size that worked for my dining room table, since that’s where it will be displayed. I stayed with the “rough” theme and just grabbed a hammer and some nails, and put it together. Nothing fancy or complicated. After my sides were put together, I had to measure for the bottom piece, cut it, and nail that in as well. I then took a sanding block
If you prefer to start with a pre-made trough, check your local craft store for unfinished wooden planters or troughs. Amazon.com has wooden serving trays
2. Painting
The taupe-colored paint that I used on my trough was an oil-based paint that I had leftover from another project, but water-based is fine, too! It took me only five minutes to get it painted, but I made sure it was completely dry before I moved on to step 3.

3. Staining
Yes, you read that right — dark wood STAIN going on top of paint. What?! The dark stain over the light paint adds texture and contrast! The key is to dry-brush it on, rather than to fully brush the trough in stain! Here’s how: I completely dip my brush into my stain because I like to be able to swipe the brush over the wood piece over and over and over without having to re-dip. After I dip it, I wipe the brush off as much as possible on the edge of my can of stain. I then wipe my brush off on a thick paper towel or rag until almost no more paint wipes off. Once my brush has reached that point, I am ready to dry-brush!

This is the fun part! Start lightly until you can see and feel the effect that your brush will have when you work it over the paint. Your goal is to hit those higher rough edges with the stain so they end up darker. This gives the rustic weathered look. Your edges will look best when you keep your brush moving over and off them. Those dark lines really add depth! Now, just let it dry!


4. Adding hardware
At this point, it looks A-MA-ZING! You can either leave it as it is, OR add some decorative hardware to each end. I chose wooden handles


USE YOUR RUSTIC TROUGH AS A BASE FOR HOLIDAY DECOR!
I took another one of the troughs I had made and filled it with some glittery Christmas ornaments, and it really added a nice touch of sparkle to my kitchen table this past Christmas season! So easy and inexpensive!


Try this rustic wooden trough centerpiece and comment below telling me about it when you do! The great thing about this piece of decor is that is so easy to customize to fit any spot in your space that needs something special….and of course we talked about all the different things we could fill it with! Get building! 😉
Check out more of our DIY Rustic Home Decor projects!