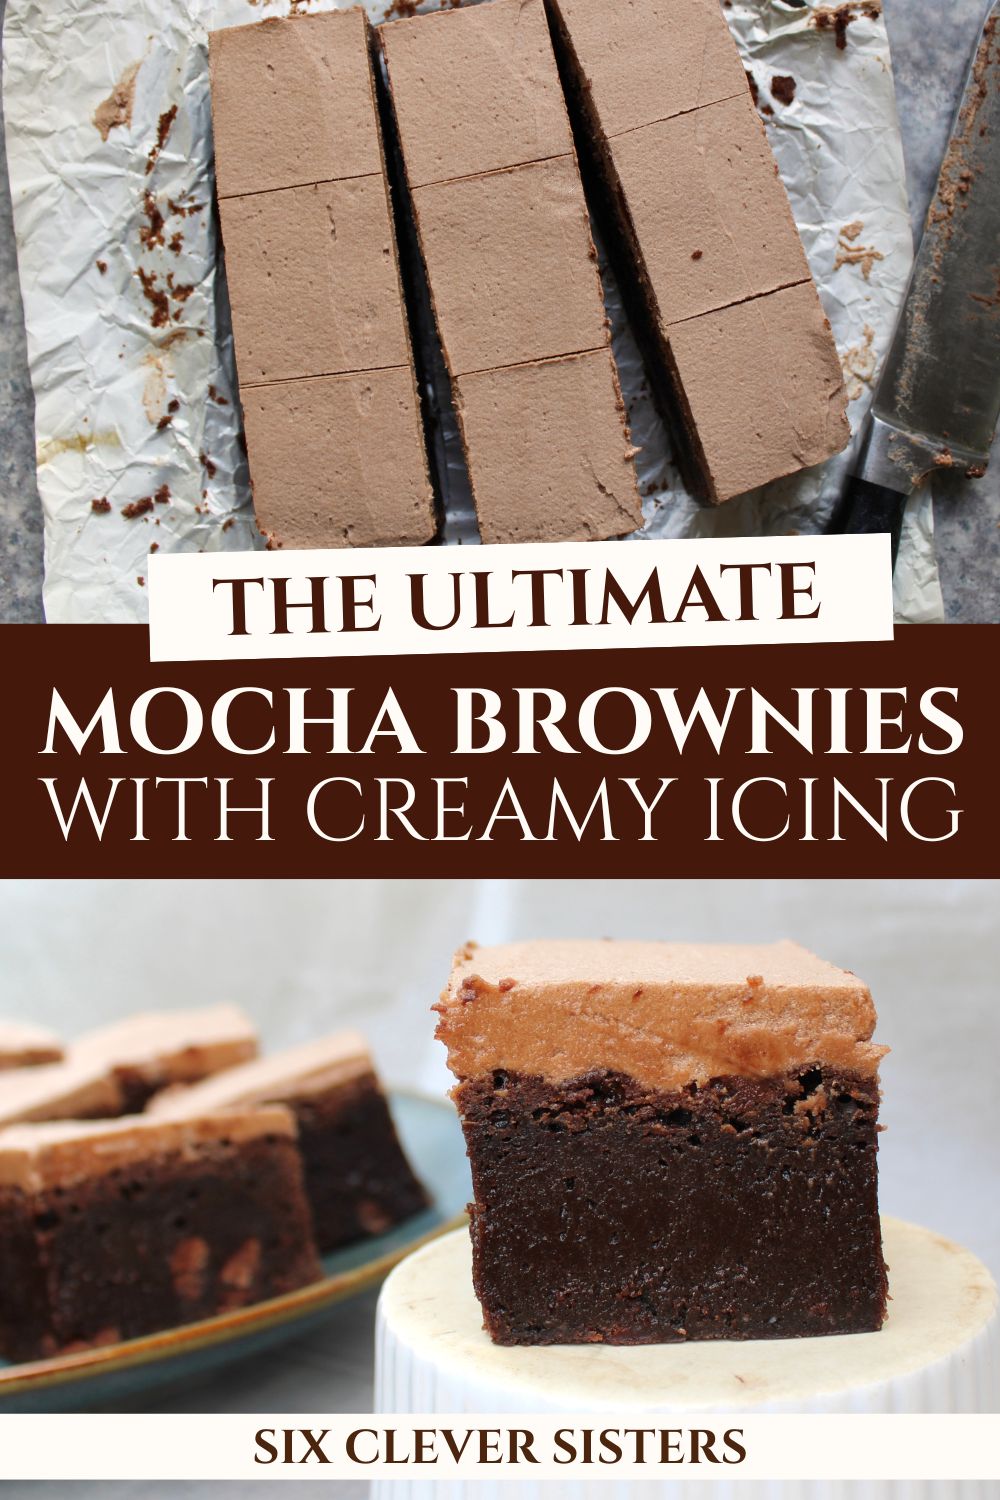
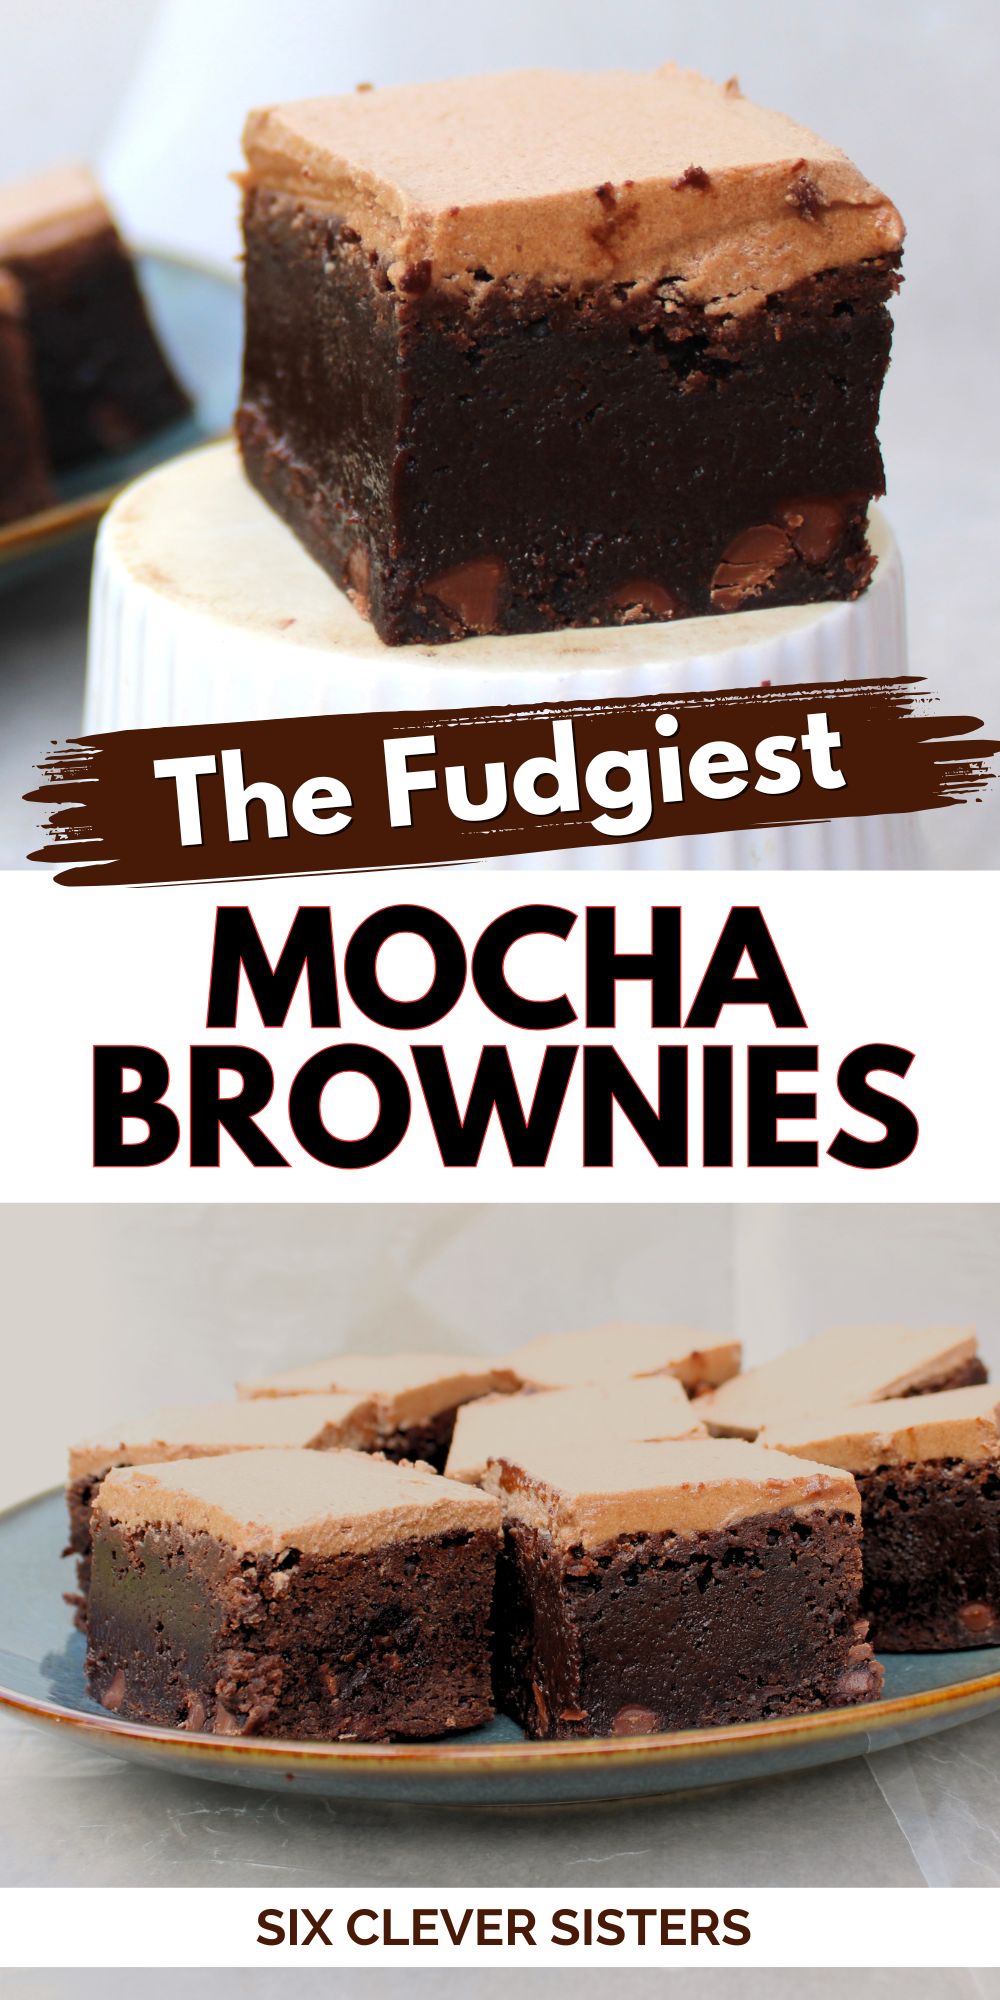
Ultimate Mocha Brownies Topped with Creamy Frosting
Rich Mocha Brownies with Frosting in 6 Simple Steps
Start with a simple brownie mix . . . and transform it into cafe-worthy treats with espresso powder and frosting that will ruin store-bought for you forever.
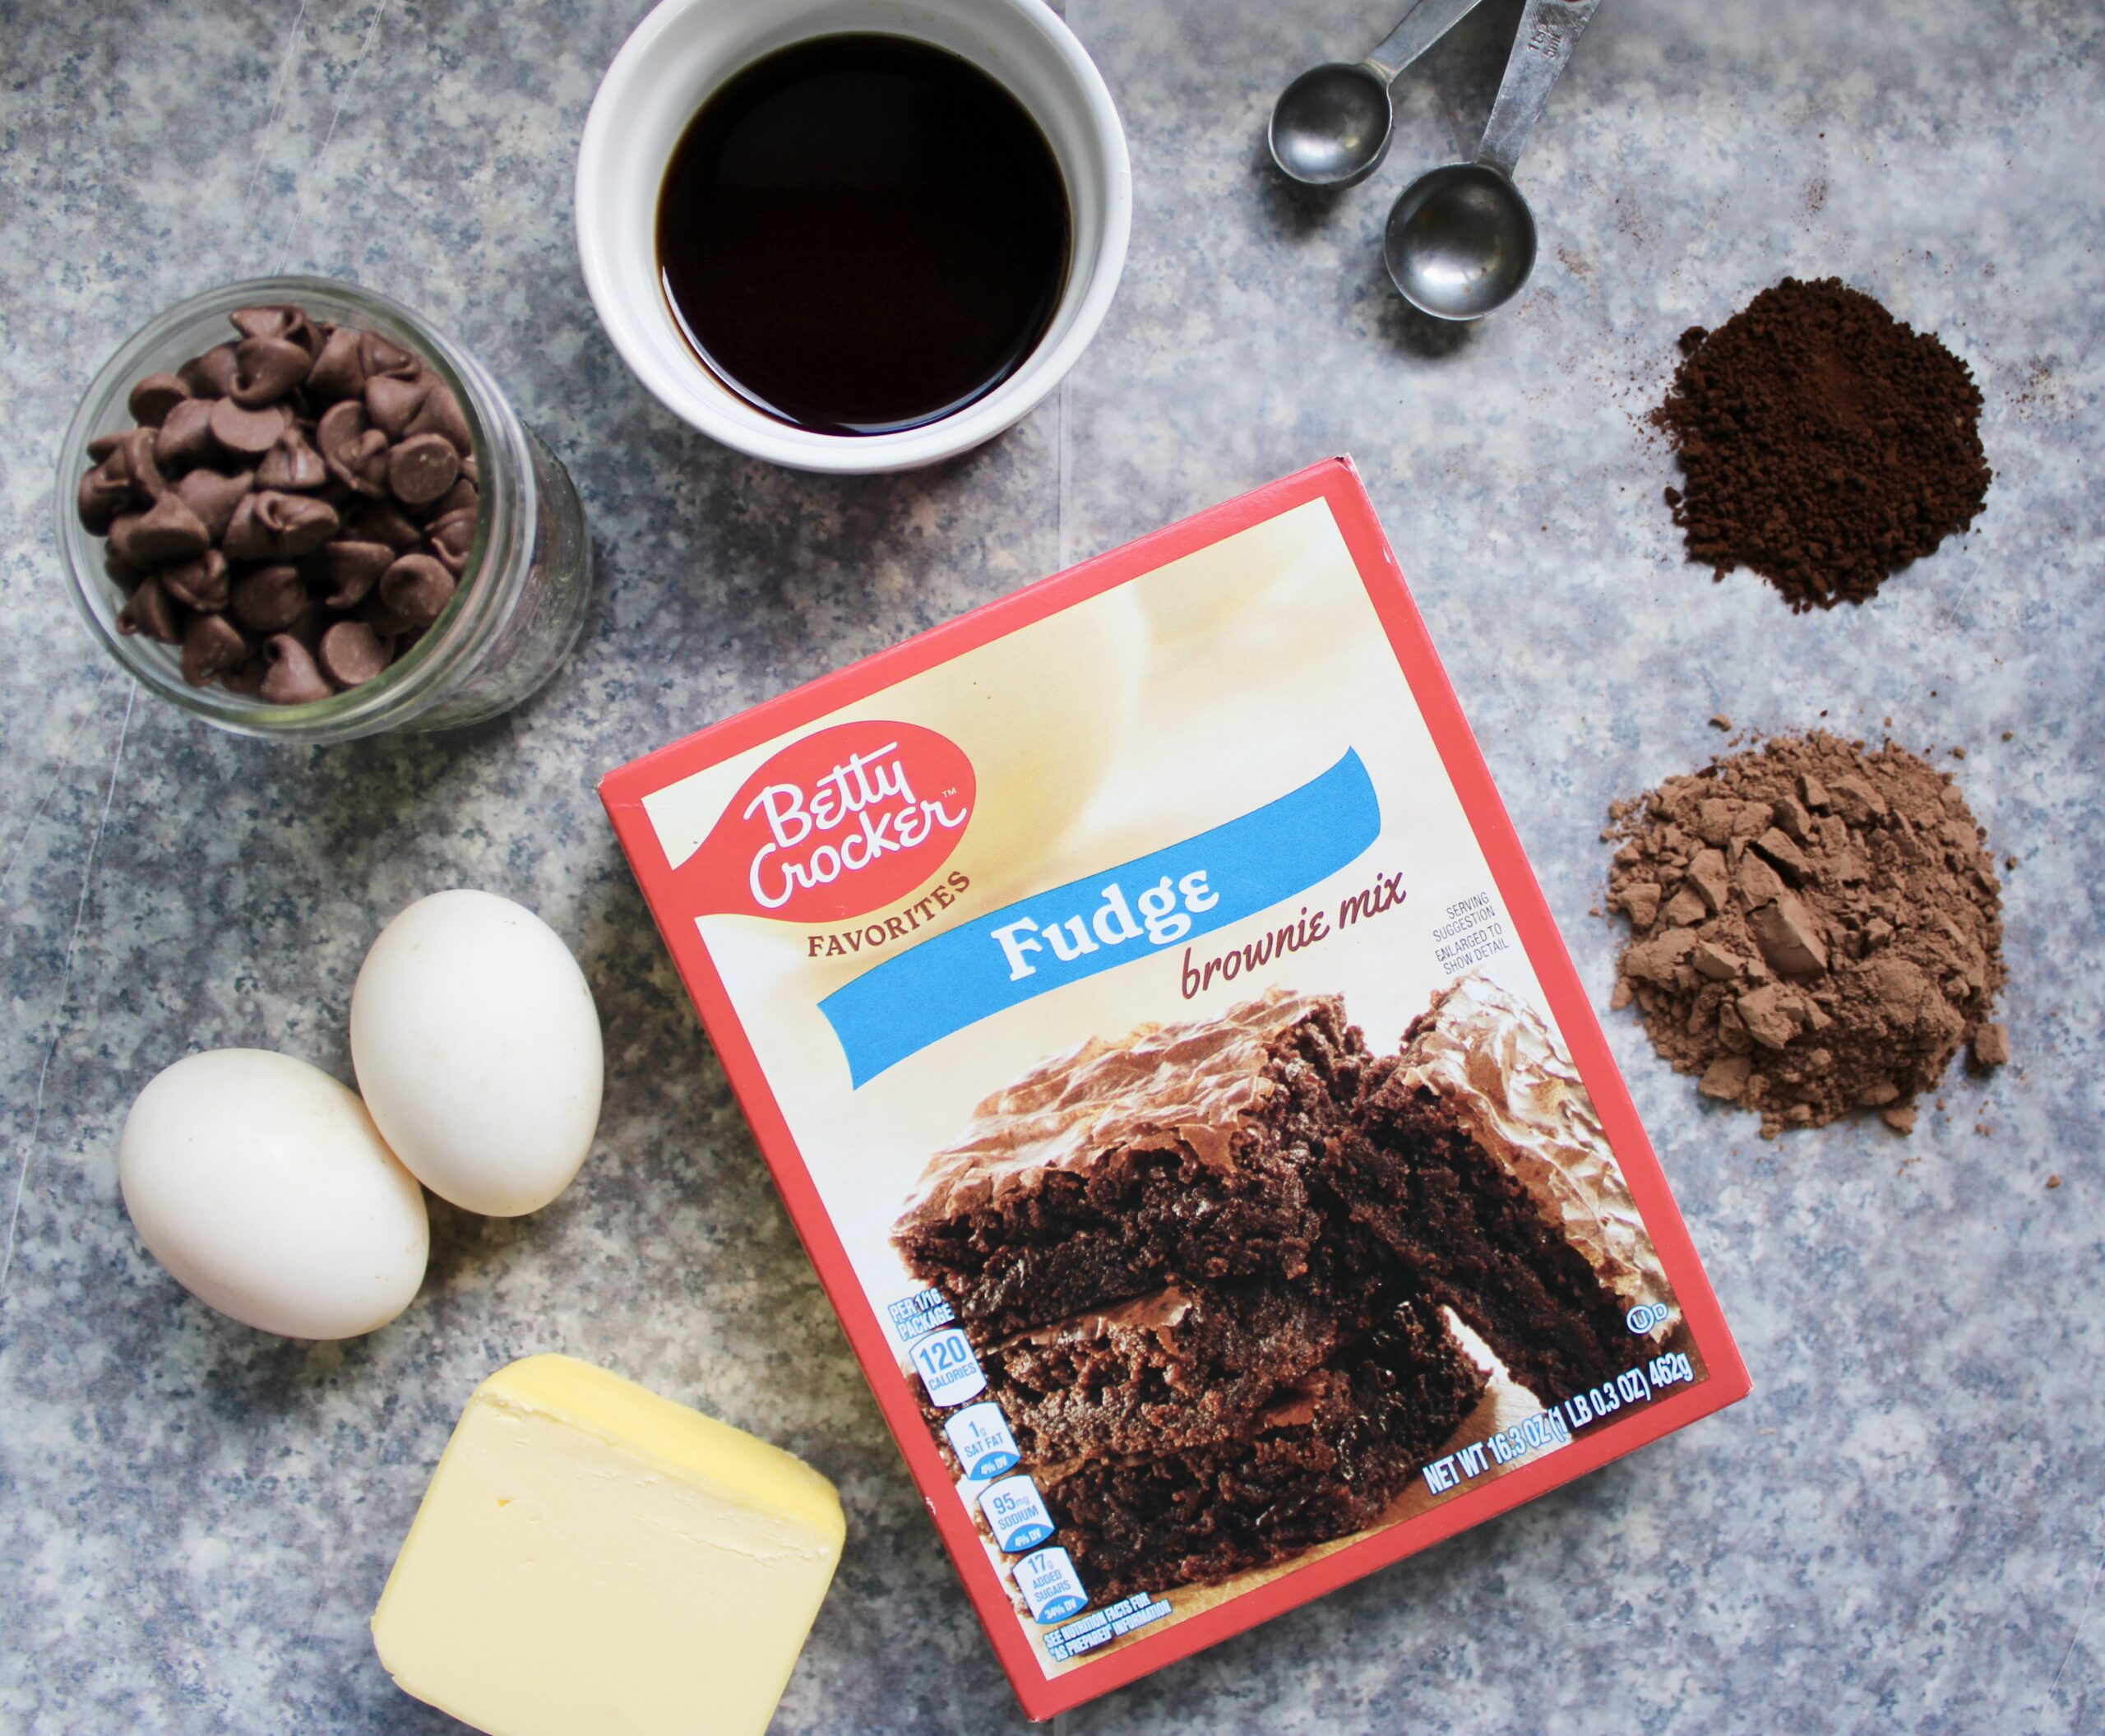
I. GATHER YOUR INGREDIENTS FOR THE BROWNIE BASE
The Fudgy Foundation You Cannot Skip
- – The secret to bakery-level brownies? It starts with a simple brownie mix and a few key additions before you even turn on the oven.
- – Here is everything you need to transform a basic brownie mix into the richest, most intensely chocolate brownies that taste like a coffee shop dessert.
- Start with a quality brownie mix as your base: Choose a fudge-style brownie mix rather than cake-style for the densest starting point, which gives you the perfect foundation to build incredible mocha brownies without measuring multiple dry ingredients.
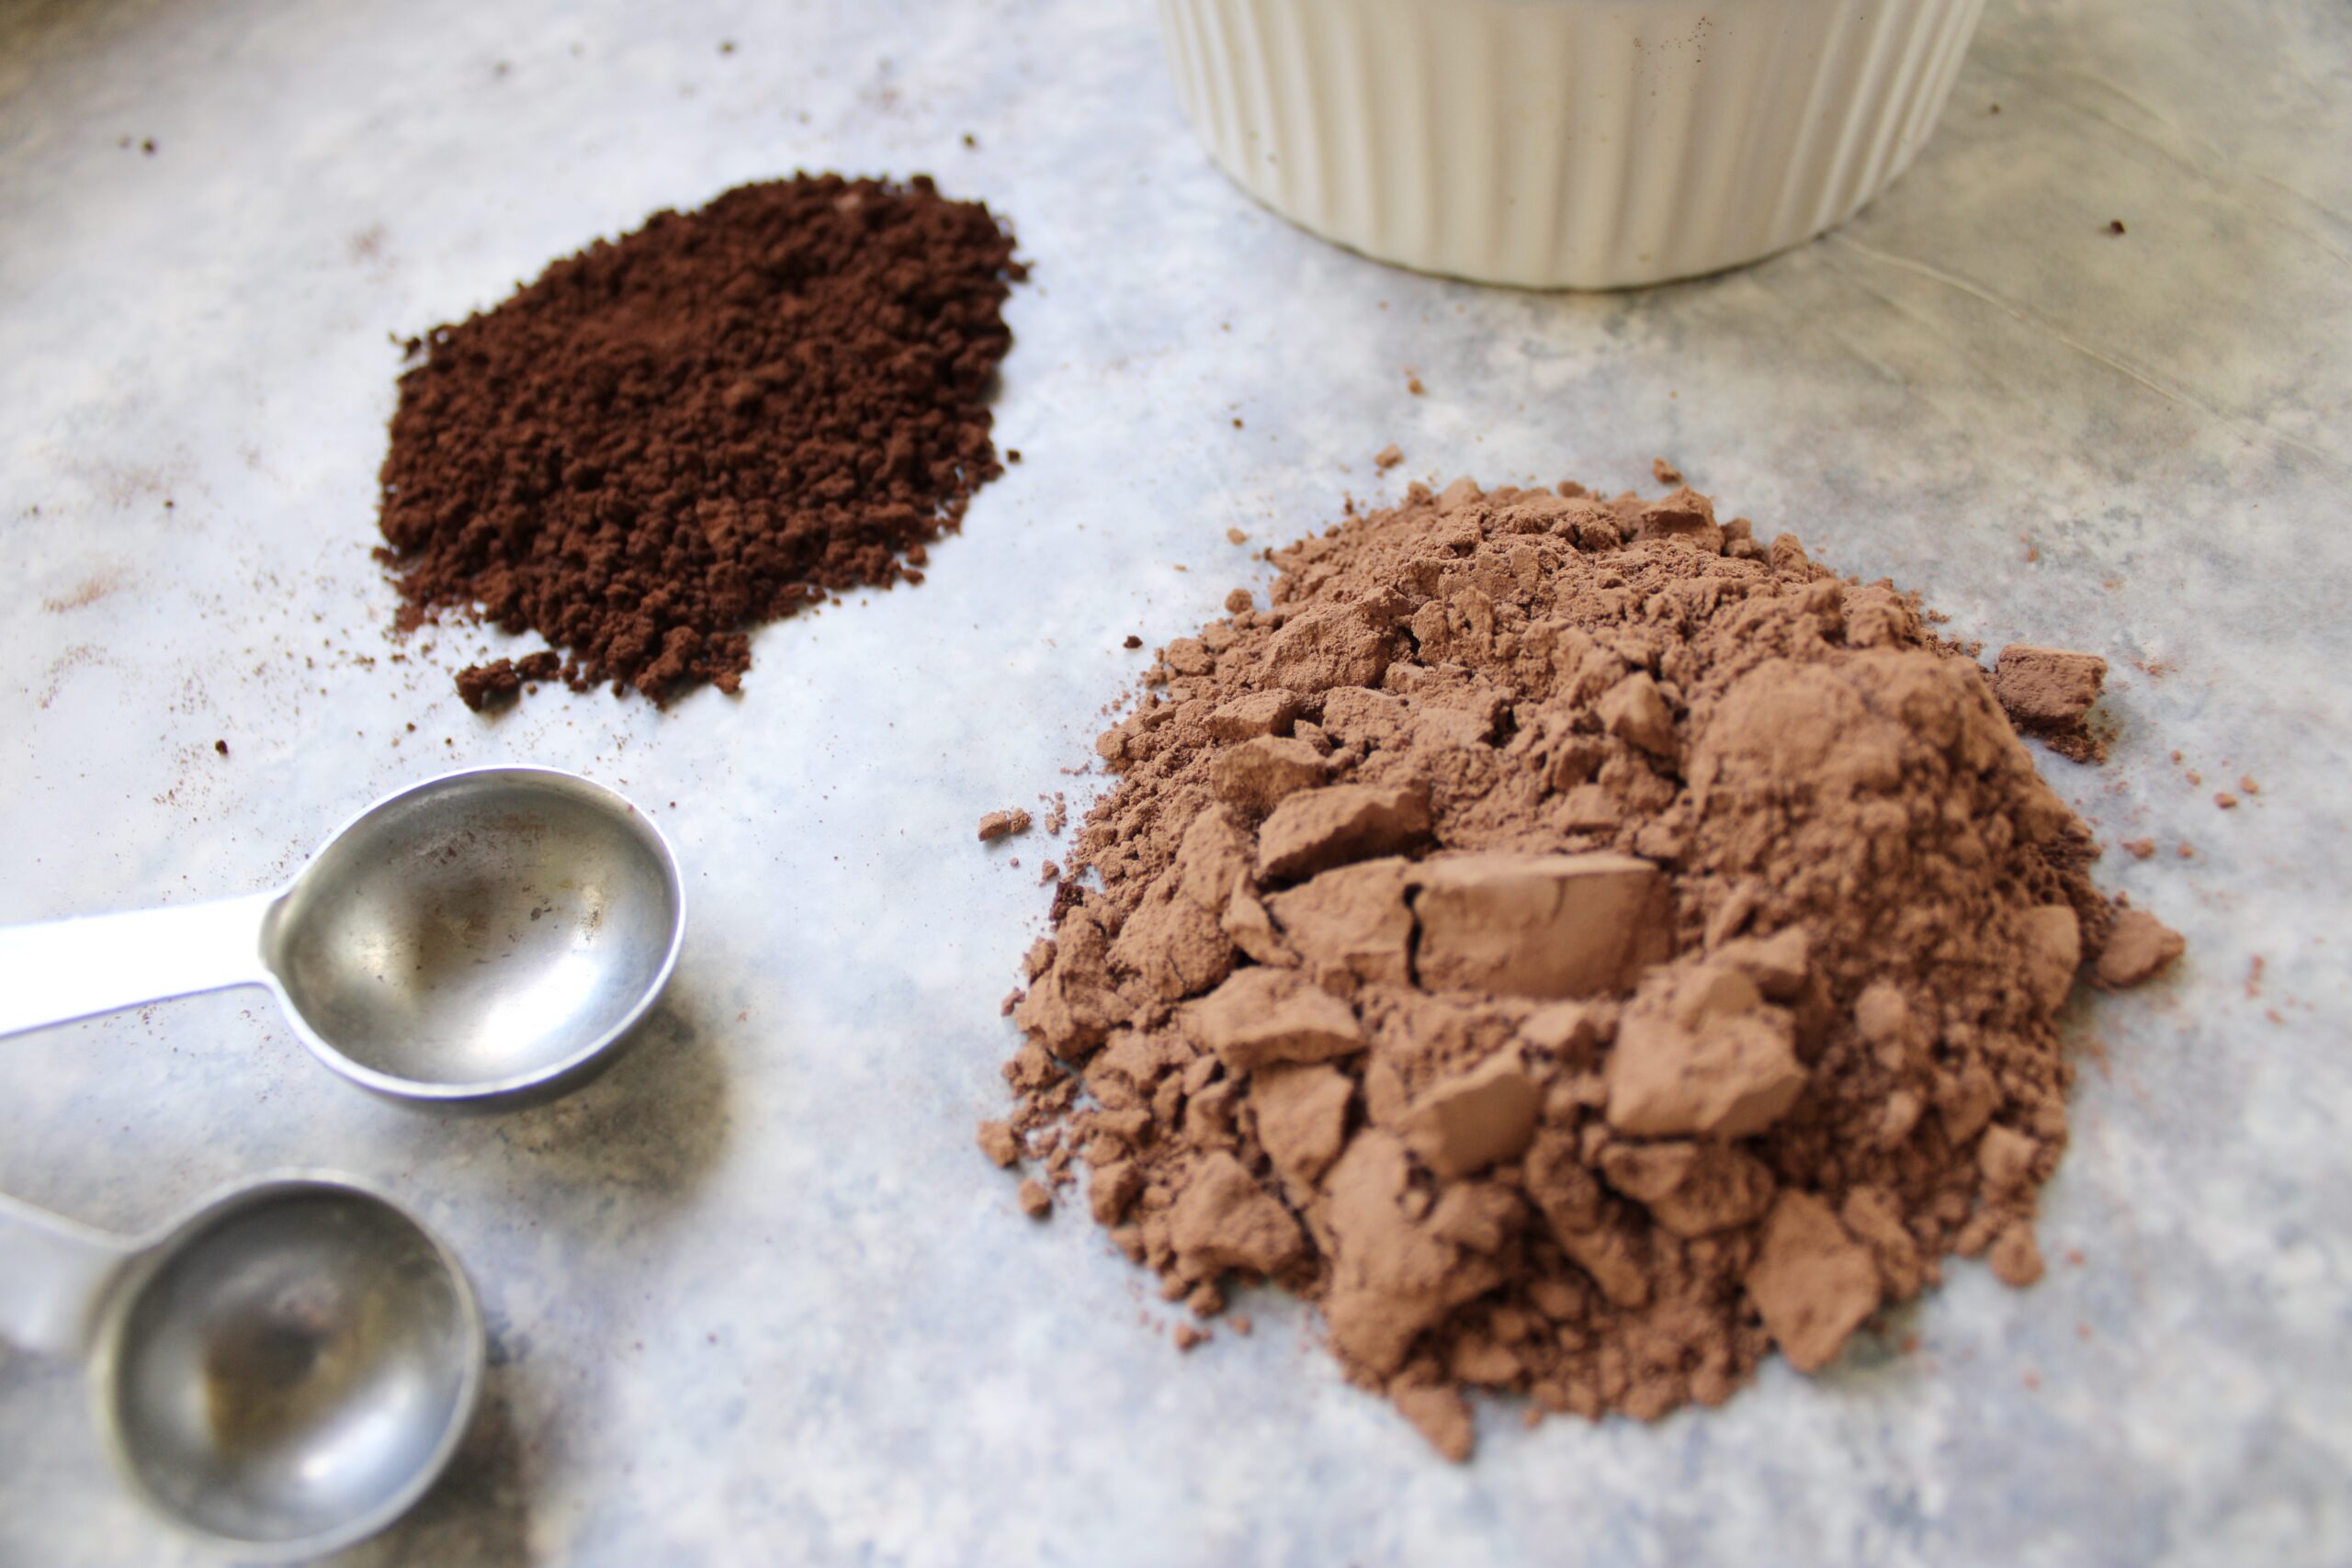
- Instant espresso powder creates depth: Adding two tablespoons of instant espresso to your brownie mix intensifies chocolate flavor while adding subtle coffee undertones that make each bite more complex and addictive.
- High-quality chocolate chips or chunks add texture: Choose semi-sweet or dark chocolate to fold into the batter, creating pockets of melted richness that contrast beautifully with the dense fudgy crumb.
- Full-fat butter brings moisture and richness: Never substitute with margarine or low-fat alternatives, as real butter creates the silky, melt-in-your-mouth texture that defines a truly fudgy brownie.
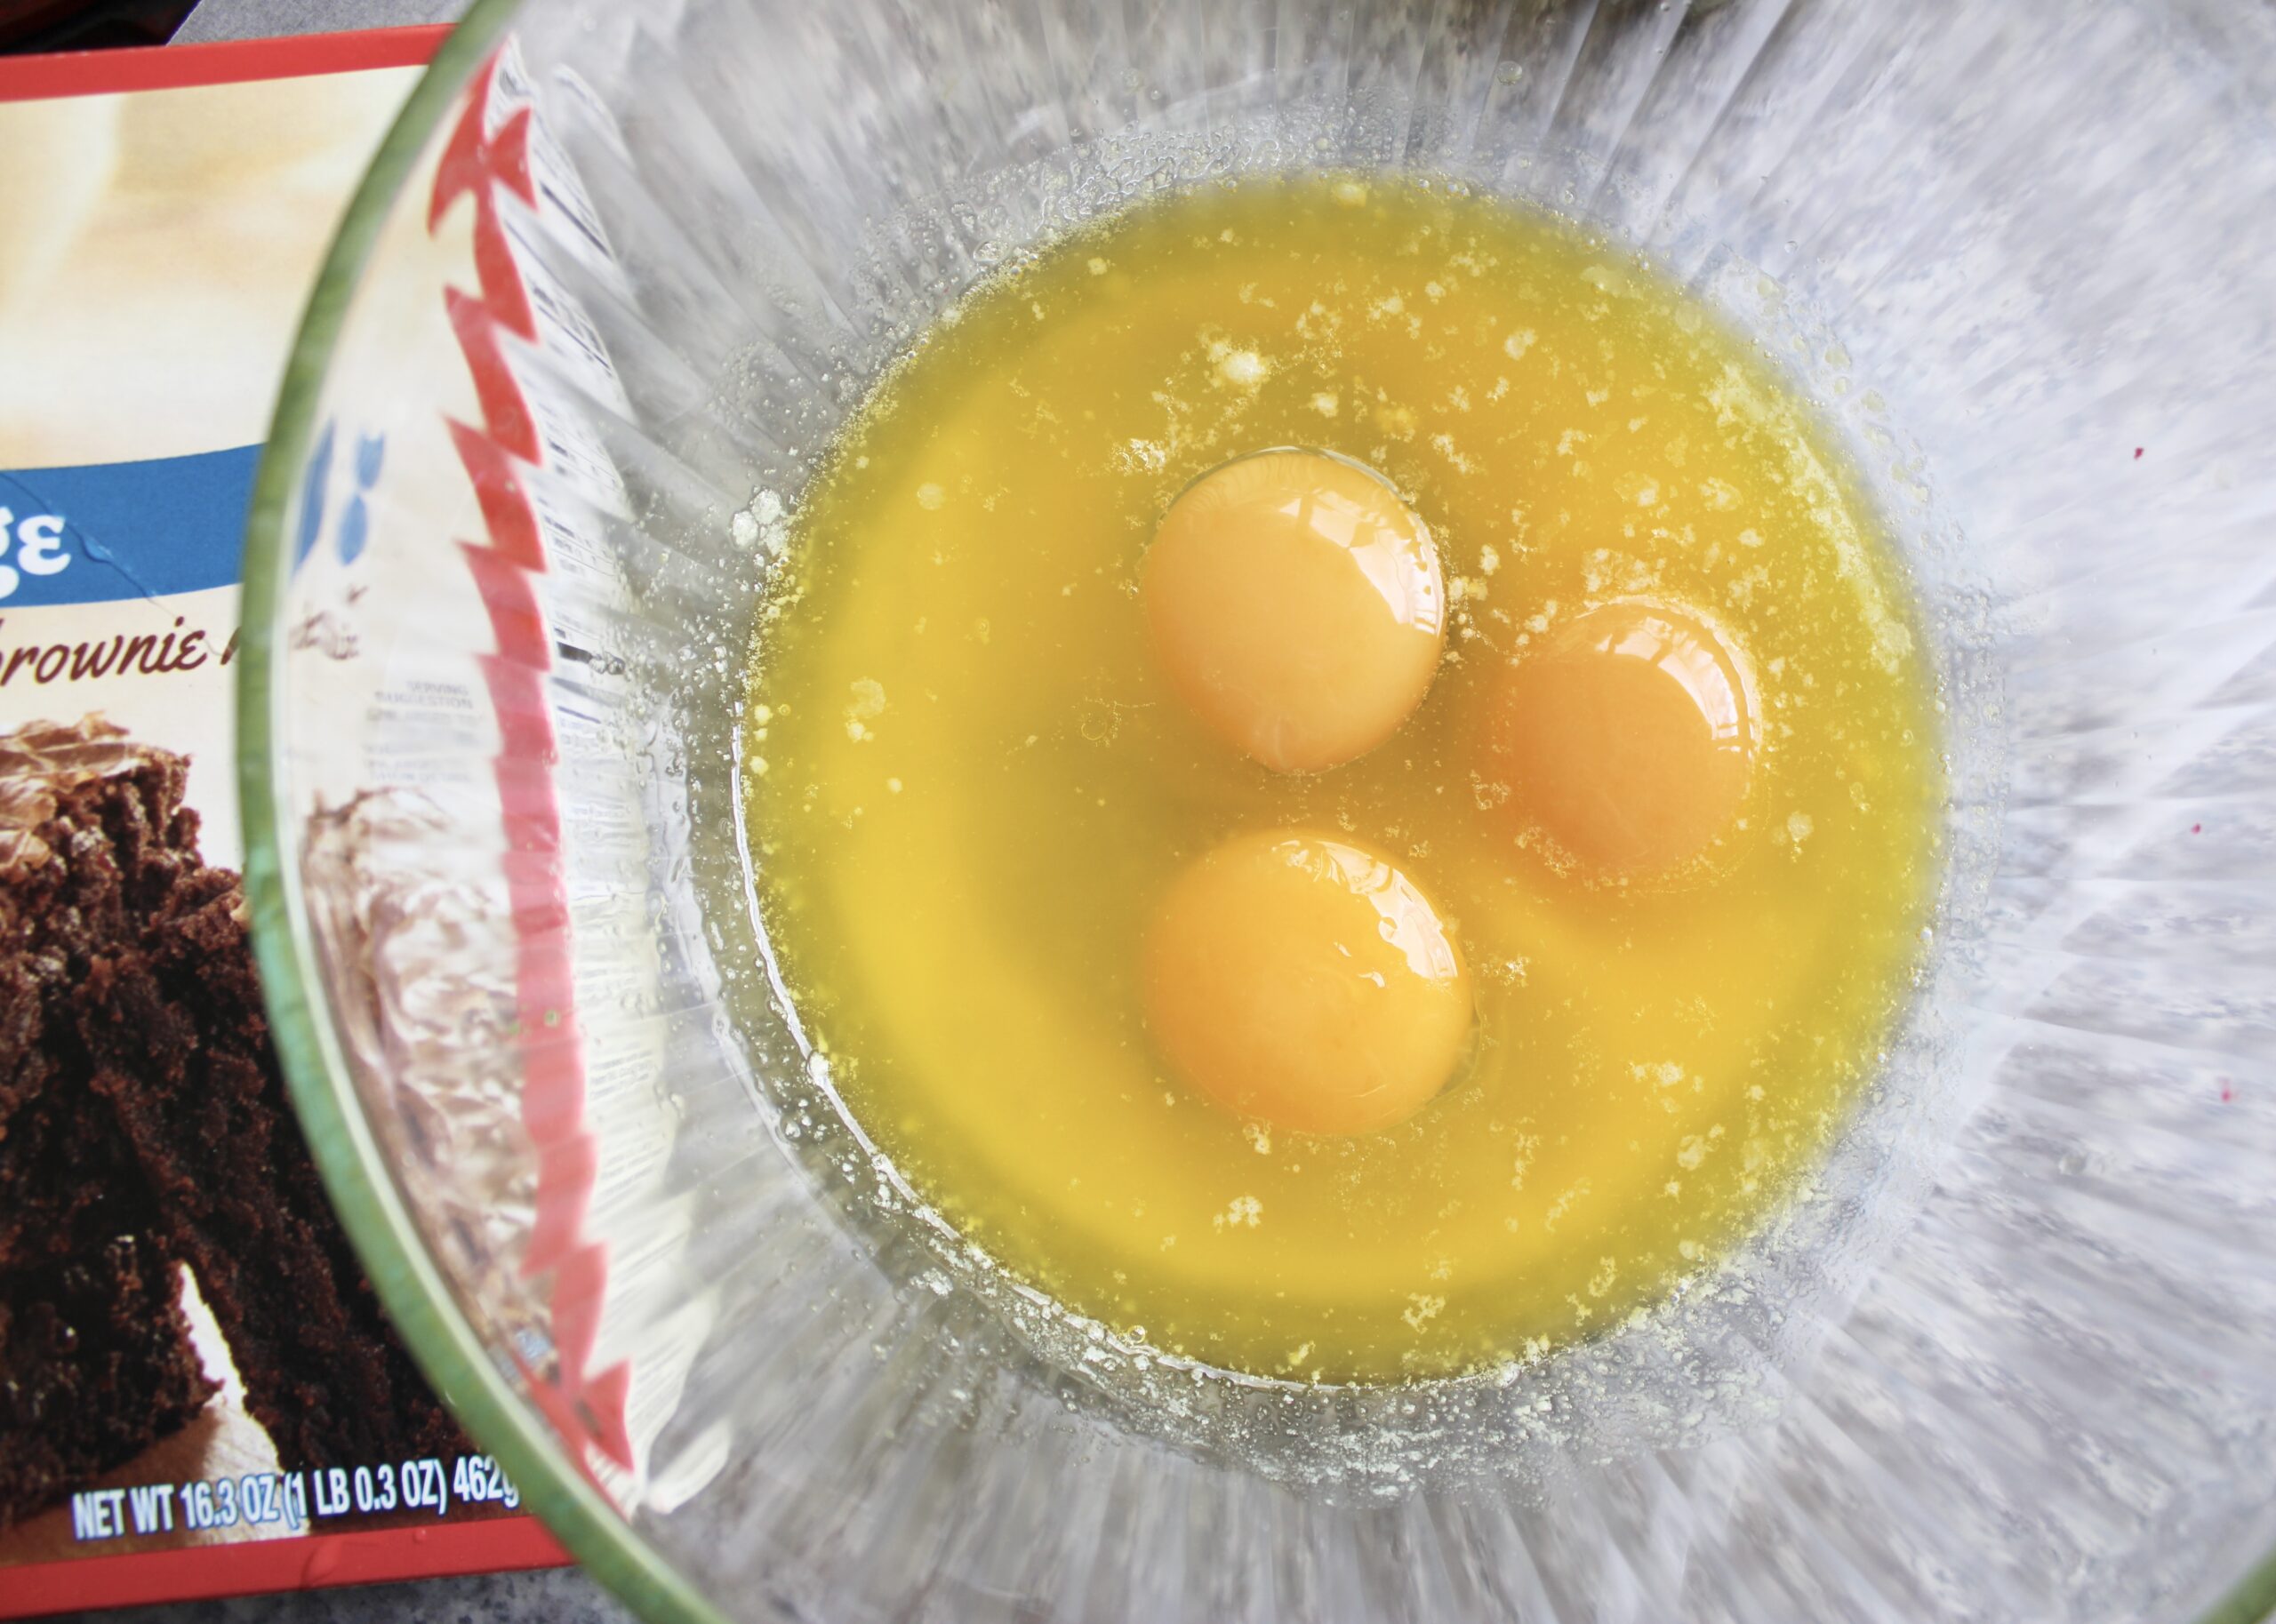
- Eggs bind everything into fudgy perfection: Room temperature eggs incorporate more easily and create a smooth, emulsified batter that bakes into dense, chewy squares instead of cakey disasters.
- Extra cocoa powder boosts chocolate intensity: Add two tablespoons of unsweetened cocoa powder to the mix for deeper, richer chocolate flavor that makes these taste completely homemade.
- – Adding espresso powder does not only make brownies taste like coffee, it actually amplifies chocolate flavor by triggering taste receptors that perceive deeper cocoa richness, which is why professional bakers never skip it.
- – Cold eggs and butter create a grainy batter that bakes unevenly, so let all refrigerated ingredients sit on the counter for 30 minutes before mixing for silkier results.
- – Not all brownie mixes are created equal, so choose brands labeled “fudge” or “dark chocolate” rather than “cake-style” or “family-style” for the best starting texture.
Once your ingredients hit the counter, the hardest part is over. Now comes the fun part: mixing magic into reality.
II. MIX THE BROWNIE BATTER CORRECTLY
How to Blend Without Destroying Fudginess – Most people overmix and end up with cakey disasters. Here is exactly how to combine your brownie mix and additions for dense, fudgy perfection.
Mixing Steps That Preserve Texture
- Step One: Melt butter gently using a microwave in 20-second intervals, stirring between each to prevent burning, which creates a smooth base for your batter.
- Step Two: Whisk espresso powder into the melted butter until fully dissolved, allowing the coffee flavor to infuse directly into the fat for maximum flavor distribution throughout every bite.
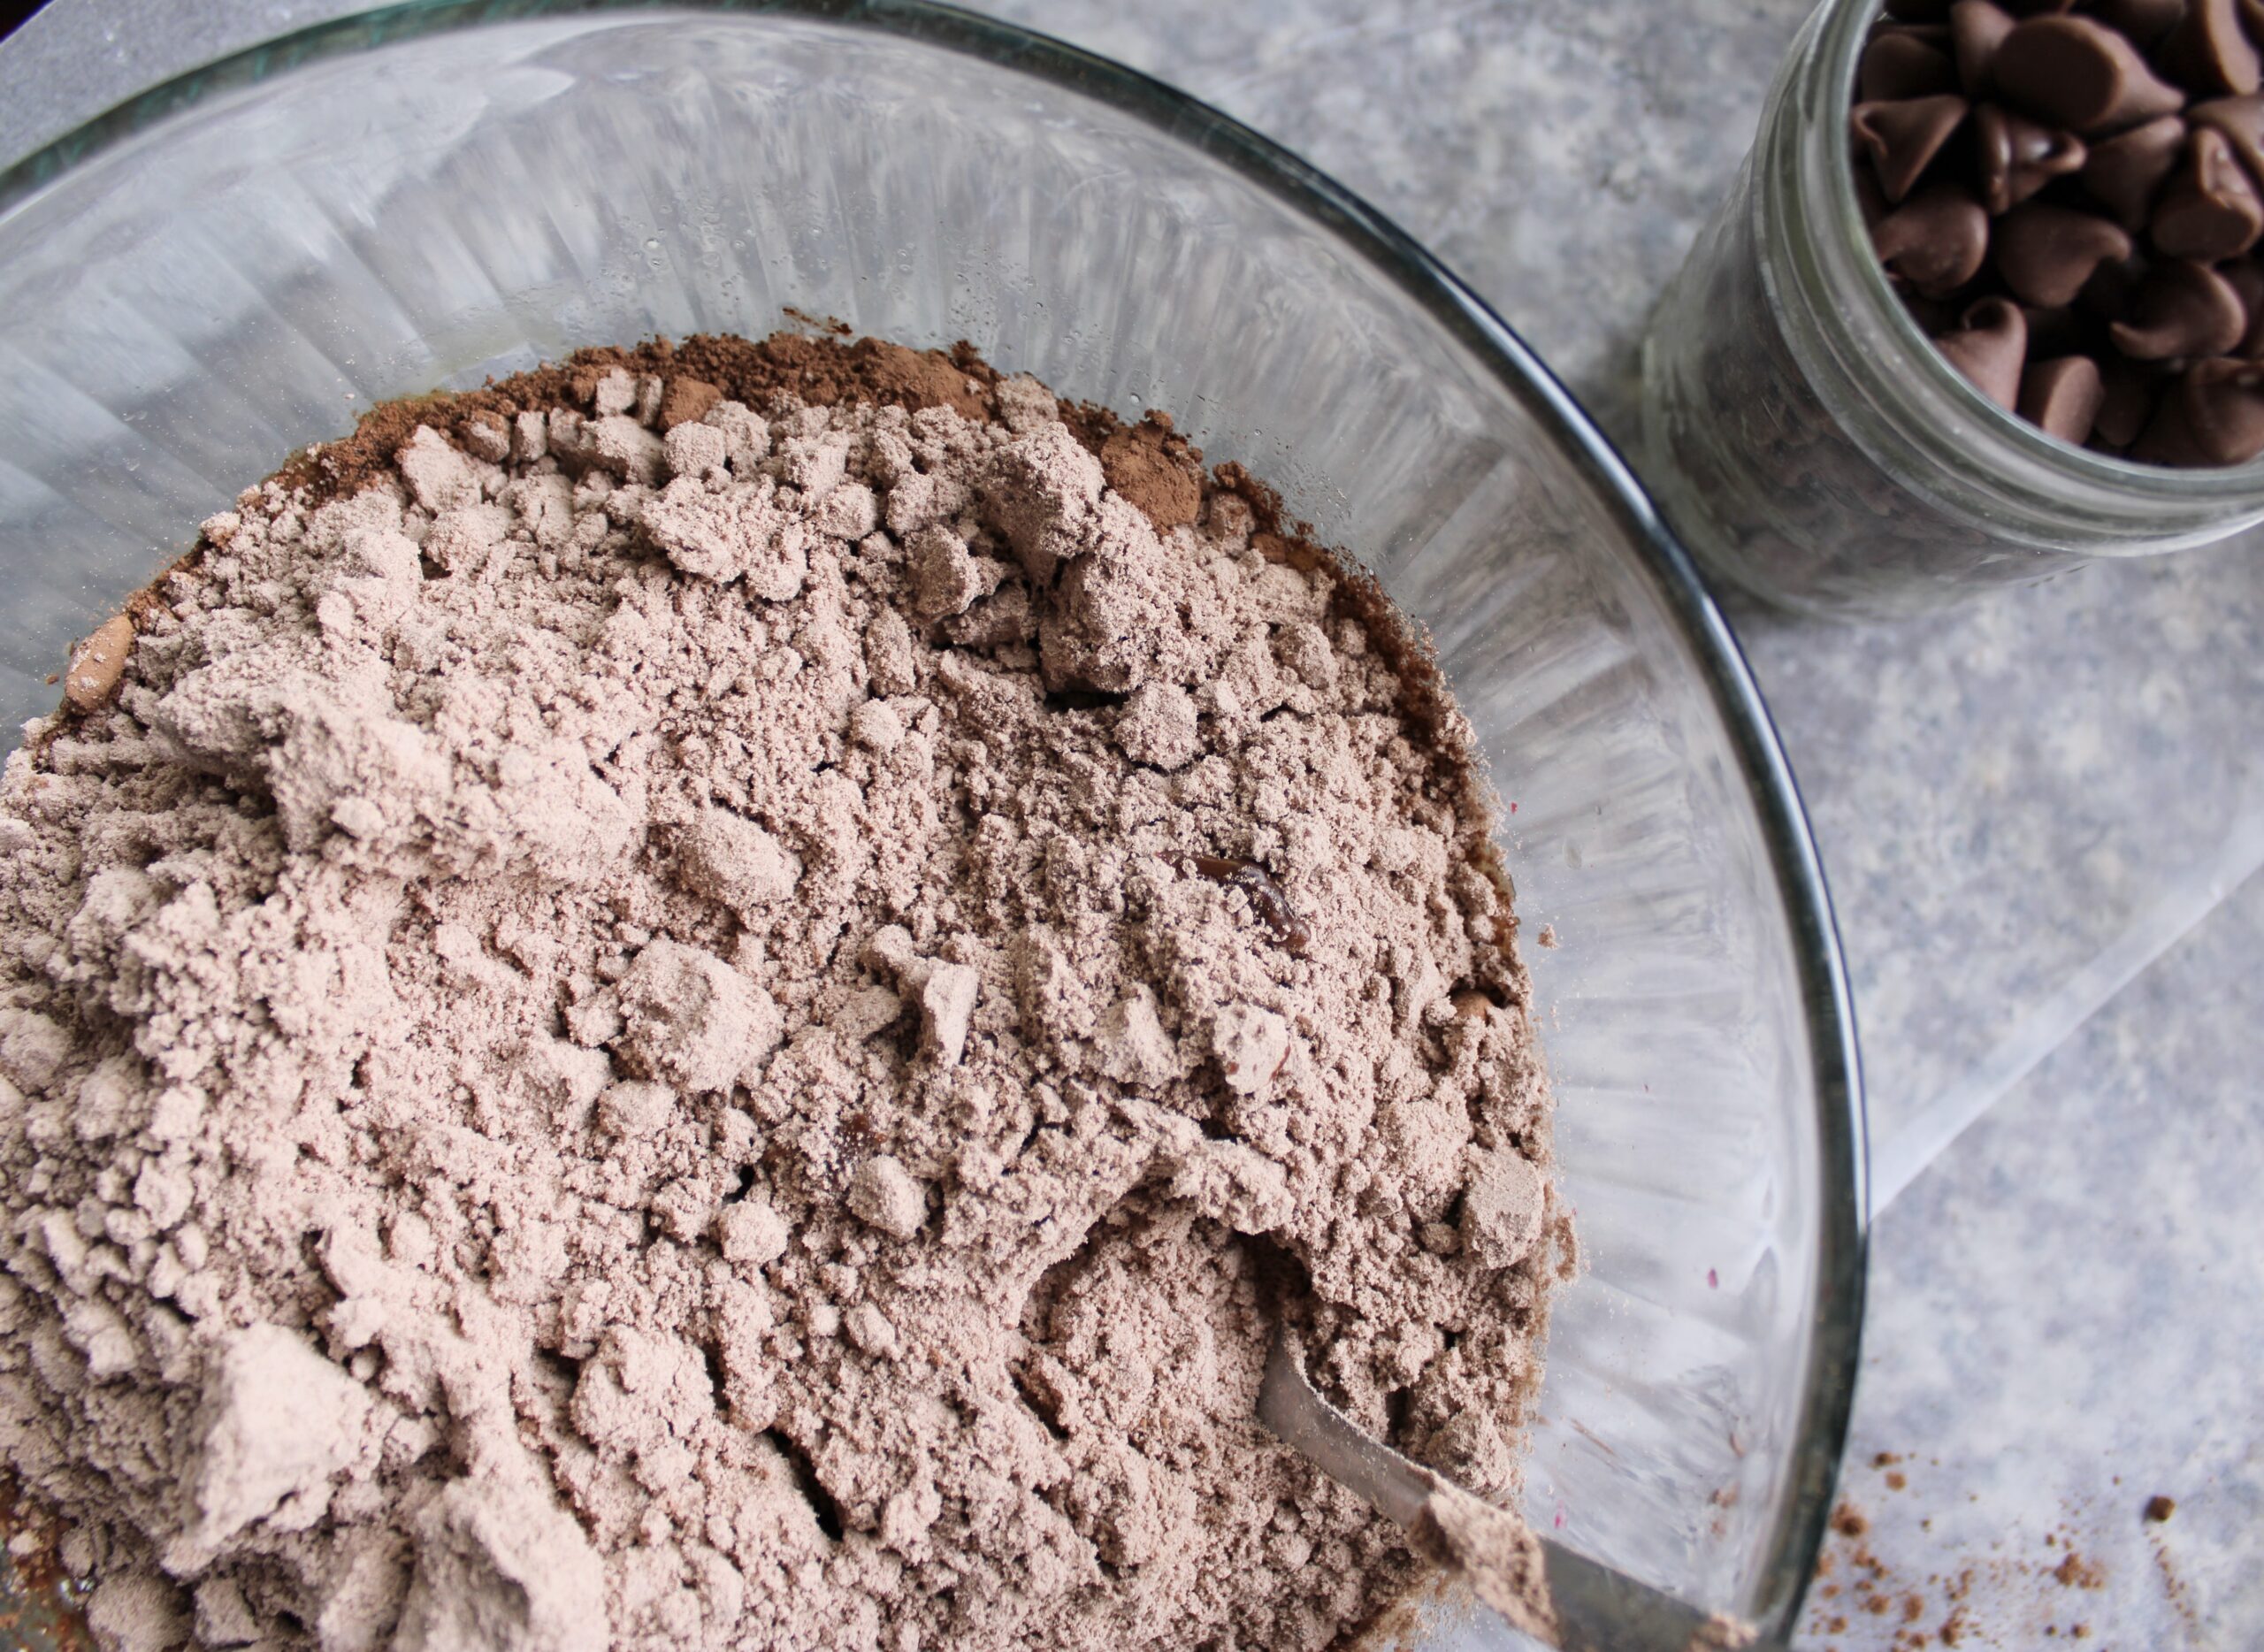
- Step Three: Add the brownie mix and extra cocoa powder to a large bowl, then pour in the espresso-butter mixture along with eggs other wet ingredients, stirring to create a thick base.
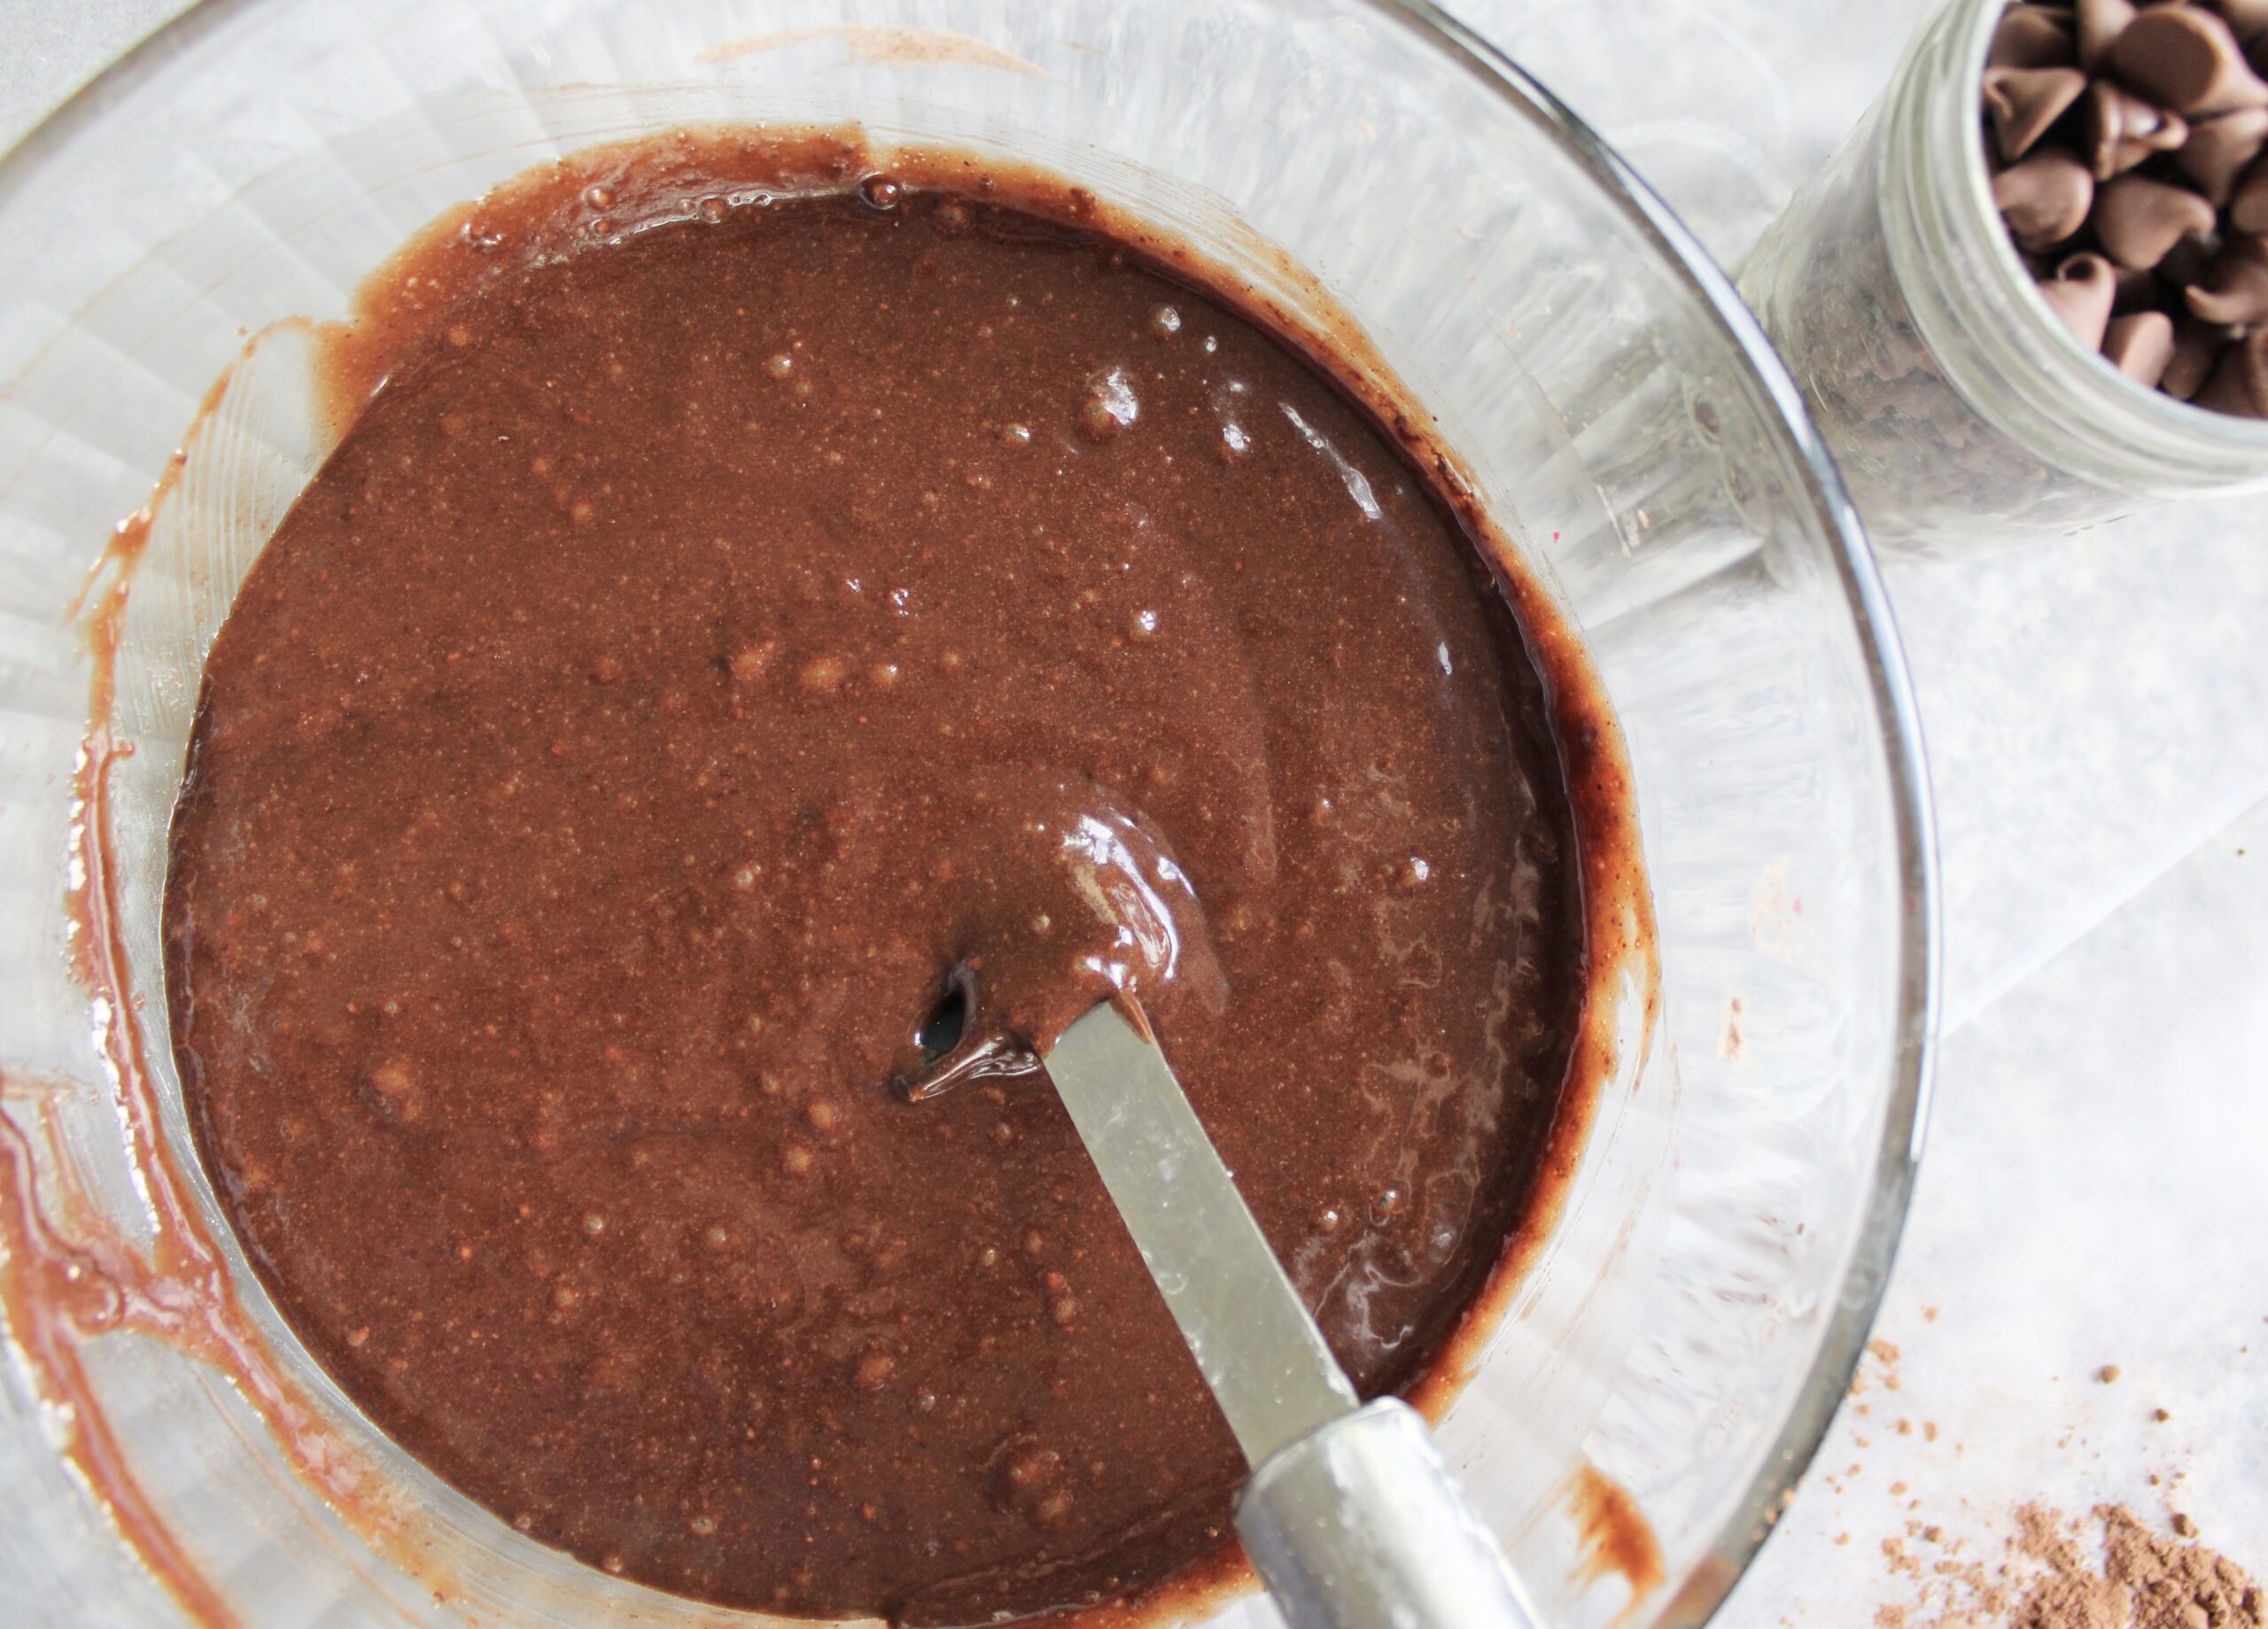
- Step Four: Beat the mixture vigorously for one minute, creating a glossy, slightly thick batter that will give your brownies their signature shiny, crackly top.
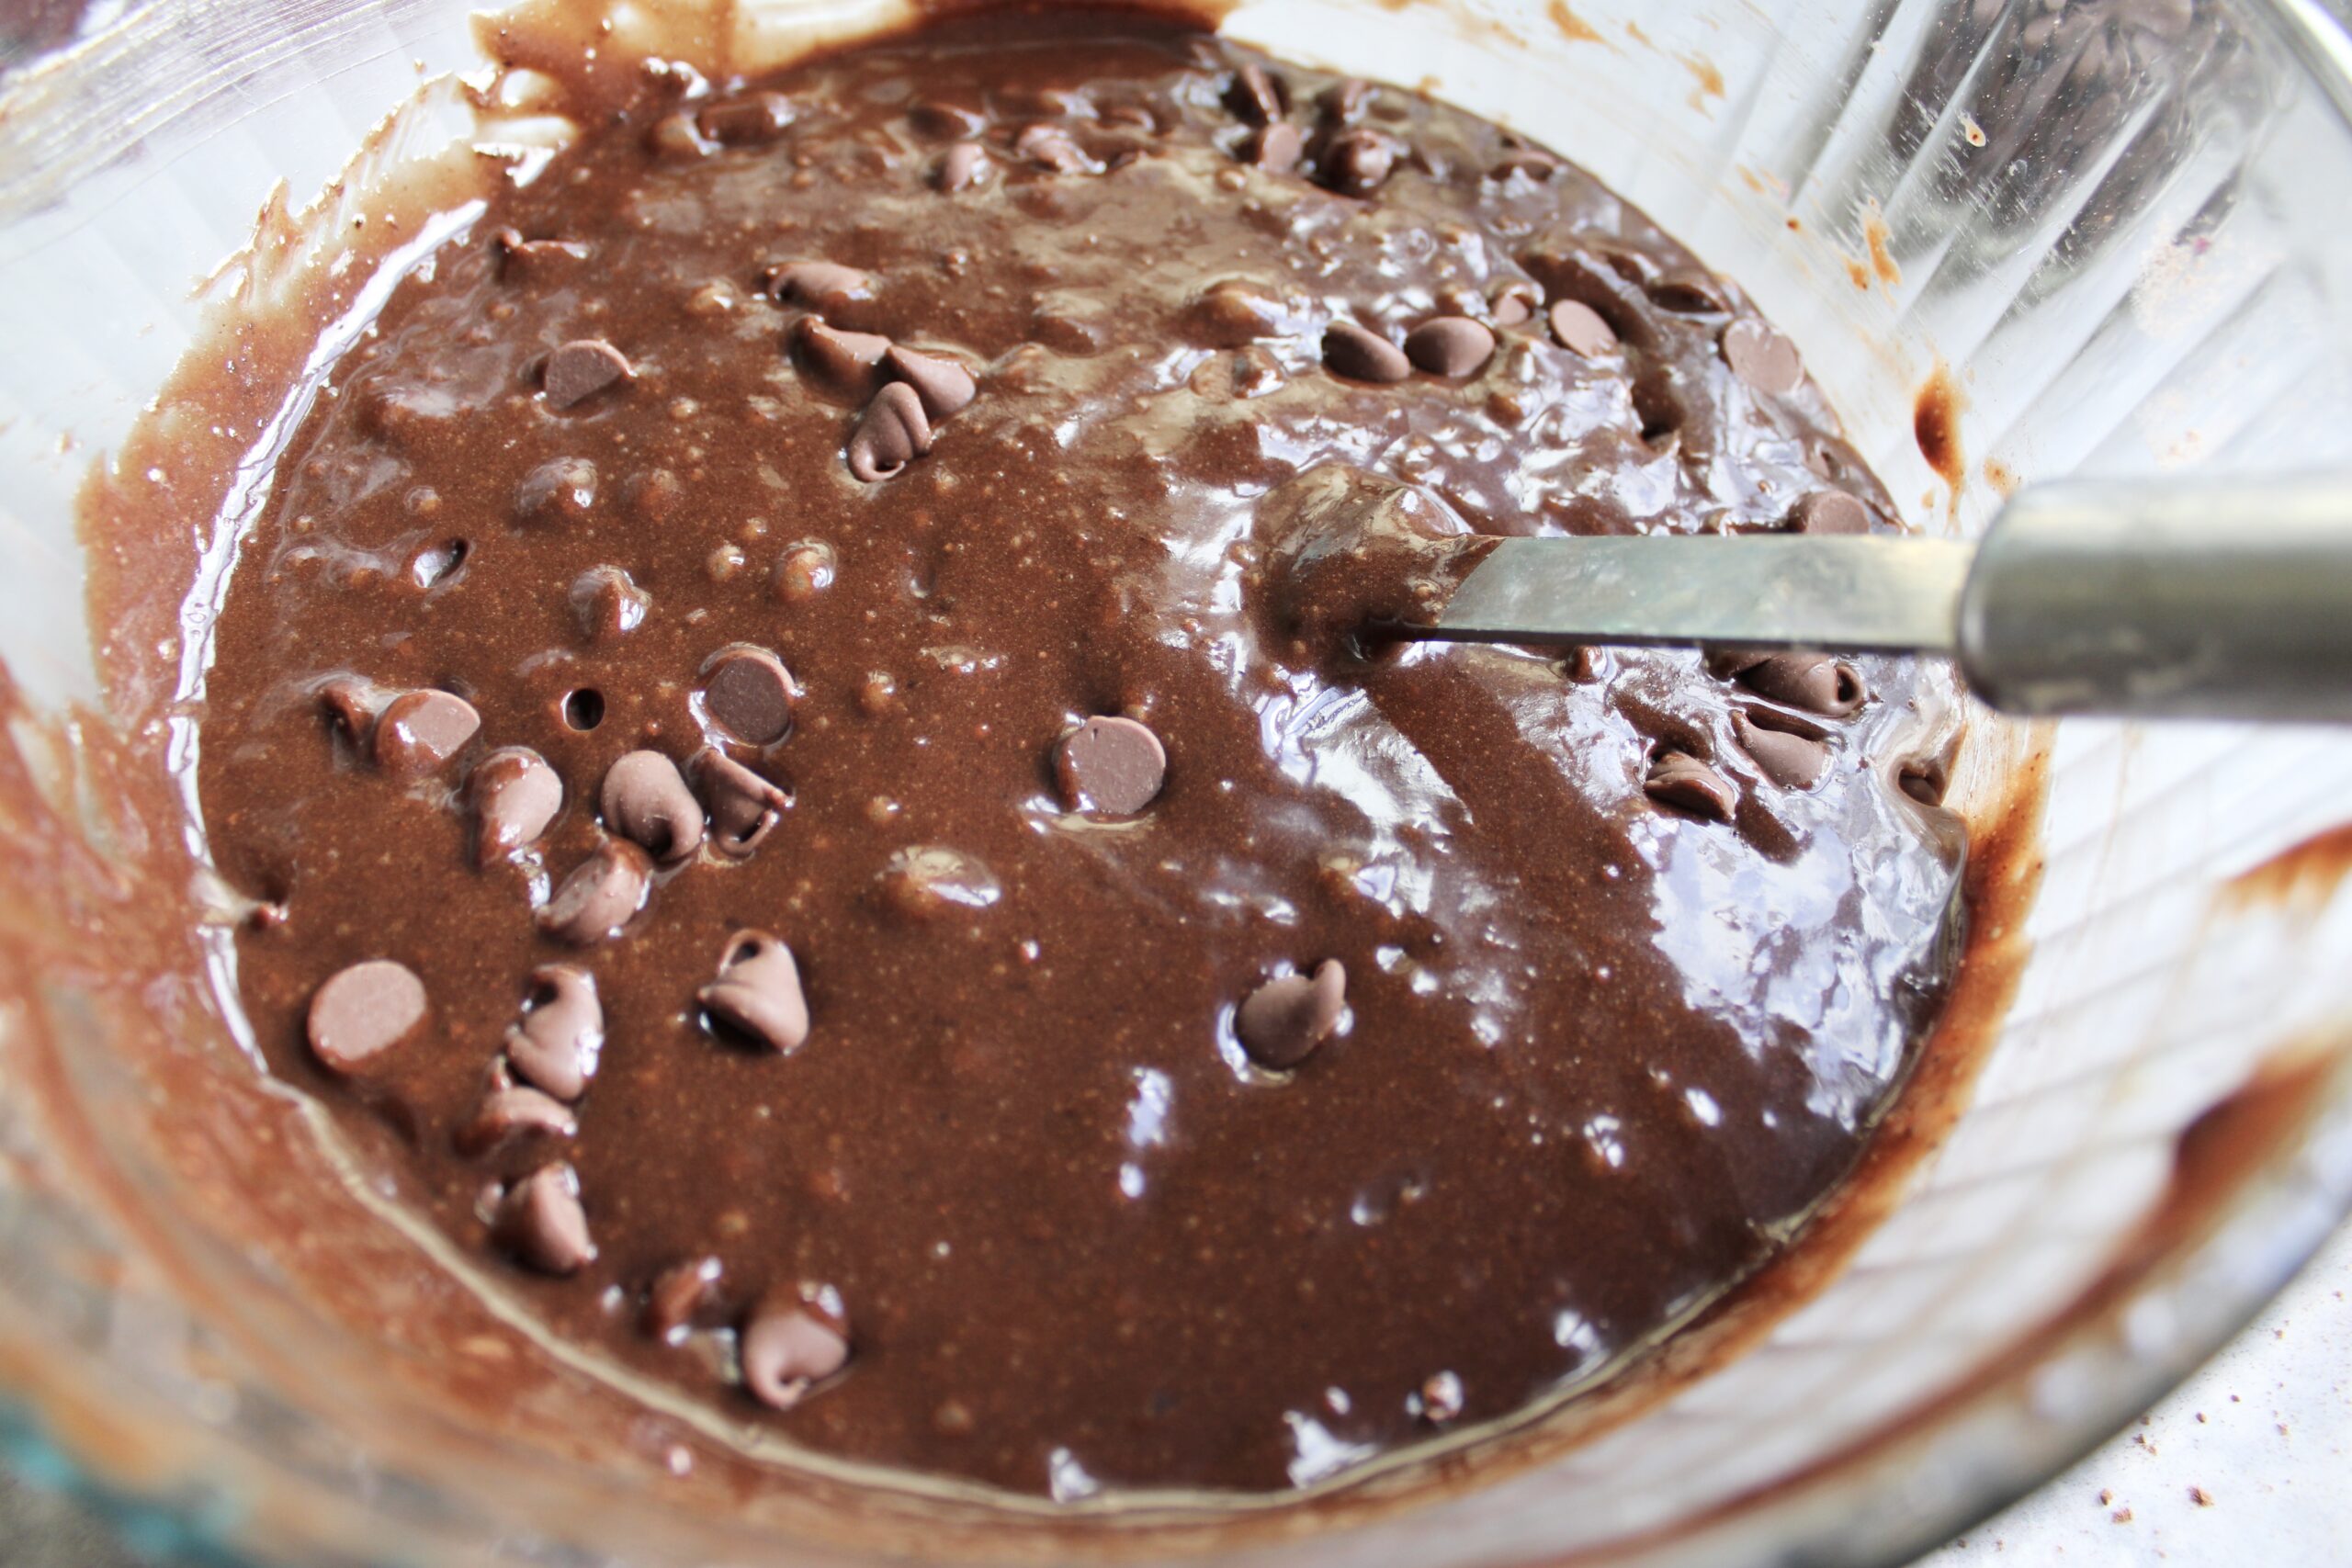
- Step Five: Fold in chocolate chips with just three or four gentle turns of the spatula, distributing them throughout the batter without deflating the mixture or overworking the gluten.
- – Once you add wet ingredients to the mix, your batter should never see more than 50 total stirs or folds, as every additional stroke develops gluten structure that transforms fudgy brownies into cake-like squares.
- – Adding eggs to a slightly warm butter mixture creates a stable emulsion that holds moisture better during baking, resulting in brownies that stay soft for up to five days.
III. BAKE THE BROWNIES TO FUDGY PERFECTION
Timing Tricks for the Ultimate Fudgy Center – Overbaking is the number one brownie killer. Here is exactly when to pull them out, even if they look underdone.
Baking Guidelines for Dense Texture
- Preheat your oven to exactly 325 degrees Fahrenheit: A lower temperature than standard recipes allows brownies to bake slowly and evenly, preventing the edges from hardening before the center sets into that perfectly fudgy consistency.
- Line your pan with parchment paper leaving overhang: This creates handles for lifting the entire brownie slab out cleanly after cooling, preventing corner breakage and making cutting into perfect squares effortless.
- Pour batter into an 8×8 or 9×9 inch pan for ideal thickness: Smaller pans create taller, fudgier brownies, while larger pans spread the batter too thin and result in crispy, cookie-like bars instead of decadent squares.
- Bake for 28 to 32 minutes, checking at 28: Insert a toothpick into the center, and if it comes out with a few moist crumbs clinging to it, your brownies are perfectly done, even though the center might jiggle slightly.
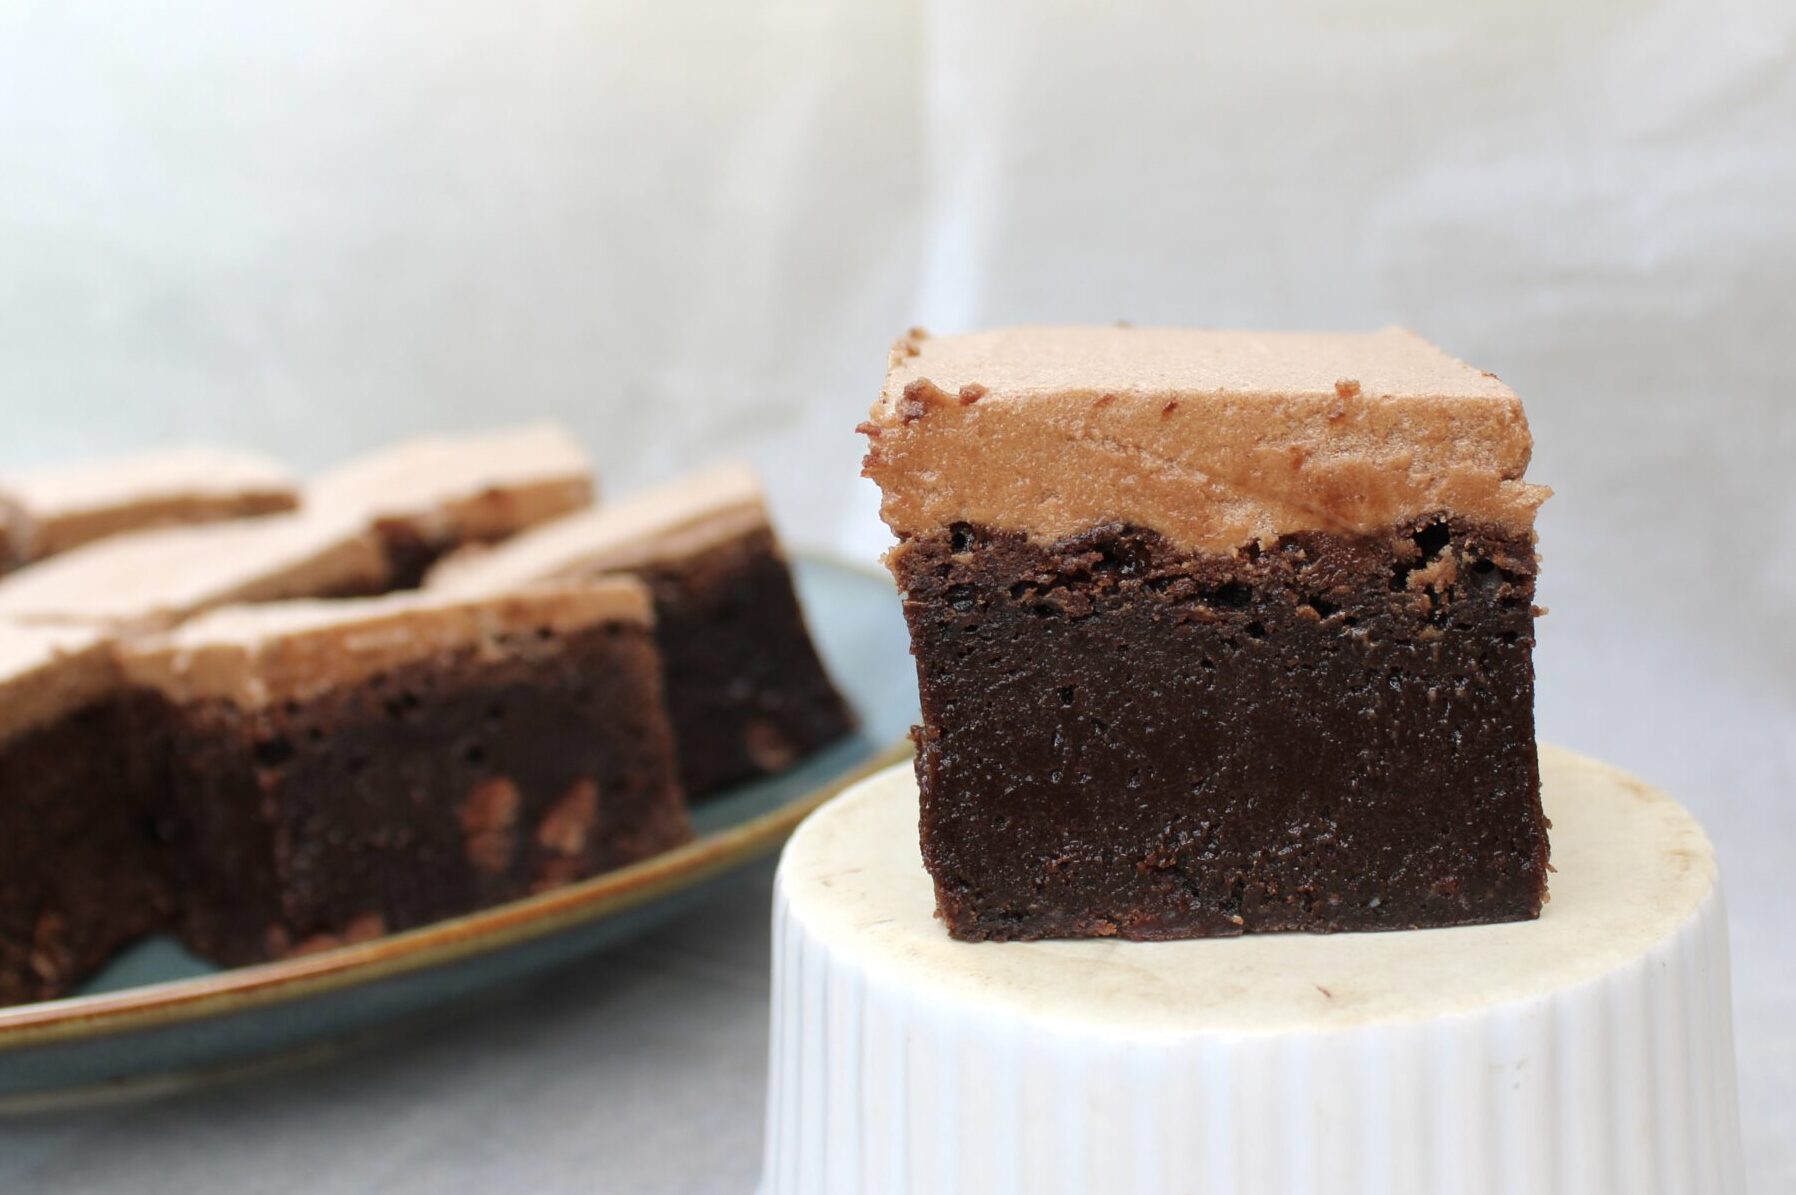
- Let brownies cool completely in the pan on a wire rack: Cutting into warm brownies causes them to fall apart and lose their fudgy structure, so patience here rewards you with clean edges and perfect texture.
- – Gently shake the pan at the 28-minute mark, and if the center jiggles like soft pudding but the edges are set, pull them out immediately for maximum fudginess that firms up during cooling.
- – Metal pans with dark or nonstick coatings absorb more heat and can overbake edges, so drop your oven temperature to 315 degrees or check for doneness three minutes earlier than the recipe states.
- – Brownies continue cooking from residual heat even after leaving the oven, which is why underbaking by two minutes in the oven results in perfect texture after cooling.
Patience pays off here. Let them cool fully, and the reward is brownie perfection that cuts clean and tastes incredible.
IV. MAKE THE SILKY MOCHA FROSTING
- The Mocha Topping That Steals the Show – If you have ever wondered what makes bakery frosting taste different, it is this exact technique with butter and espresso.
Frosting Ingredients and Method
- Softened butter is the foundation of smooth frosting: Leave butter at room temperature for at least an hour so it whips into a fluffy, light base that spreads easily and does not tear the brownie surface.
- Powdered sugar creates silky texture without grittiness: Sift powdered sugar before adding it to eliminate lumps, then gradually incorporate it into butter for frosting that feels smooth on your tongue instead of gritty or sandy.
- Instant espresso powder dissolved in milk adds mocha flavor: Mix one tablespoon of espresso powder into two tablespoons of milk, letting it dissolve fully before adding to the frosting for even coffee distribution without bitter pockets.
- Cocoa powder deepens chocolate intensity: Add two tablespoons of unsweetened cocoa to balance the sweetness of powdered sugar while reinforcing the chocolate foundation that complements the brownie base.
- Vanilla extract rounds out all the flavors: Pure vanilla extract ties together coffee, chocolate, and butter into a cohesive flavor profile that tastes complex and professionally crafted.
- Beat frosting for three full minutes until light and fluffy: High-speed mixing incorporates air that transforms dense butter and sugar into a cloud-like frosting that spreads like silk and melts on your tongue.
The 70-Degree Sweet Spot for Butter: Butter that is too cold will not whip properly, and butter that is too warm turns greasy, so aim for butter that holds a thumbprint but still feels cool to the touch.
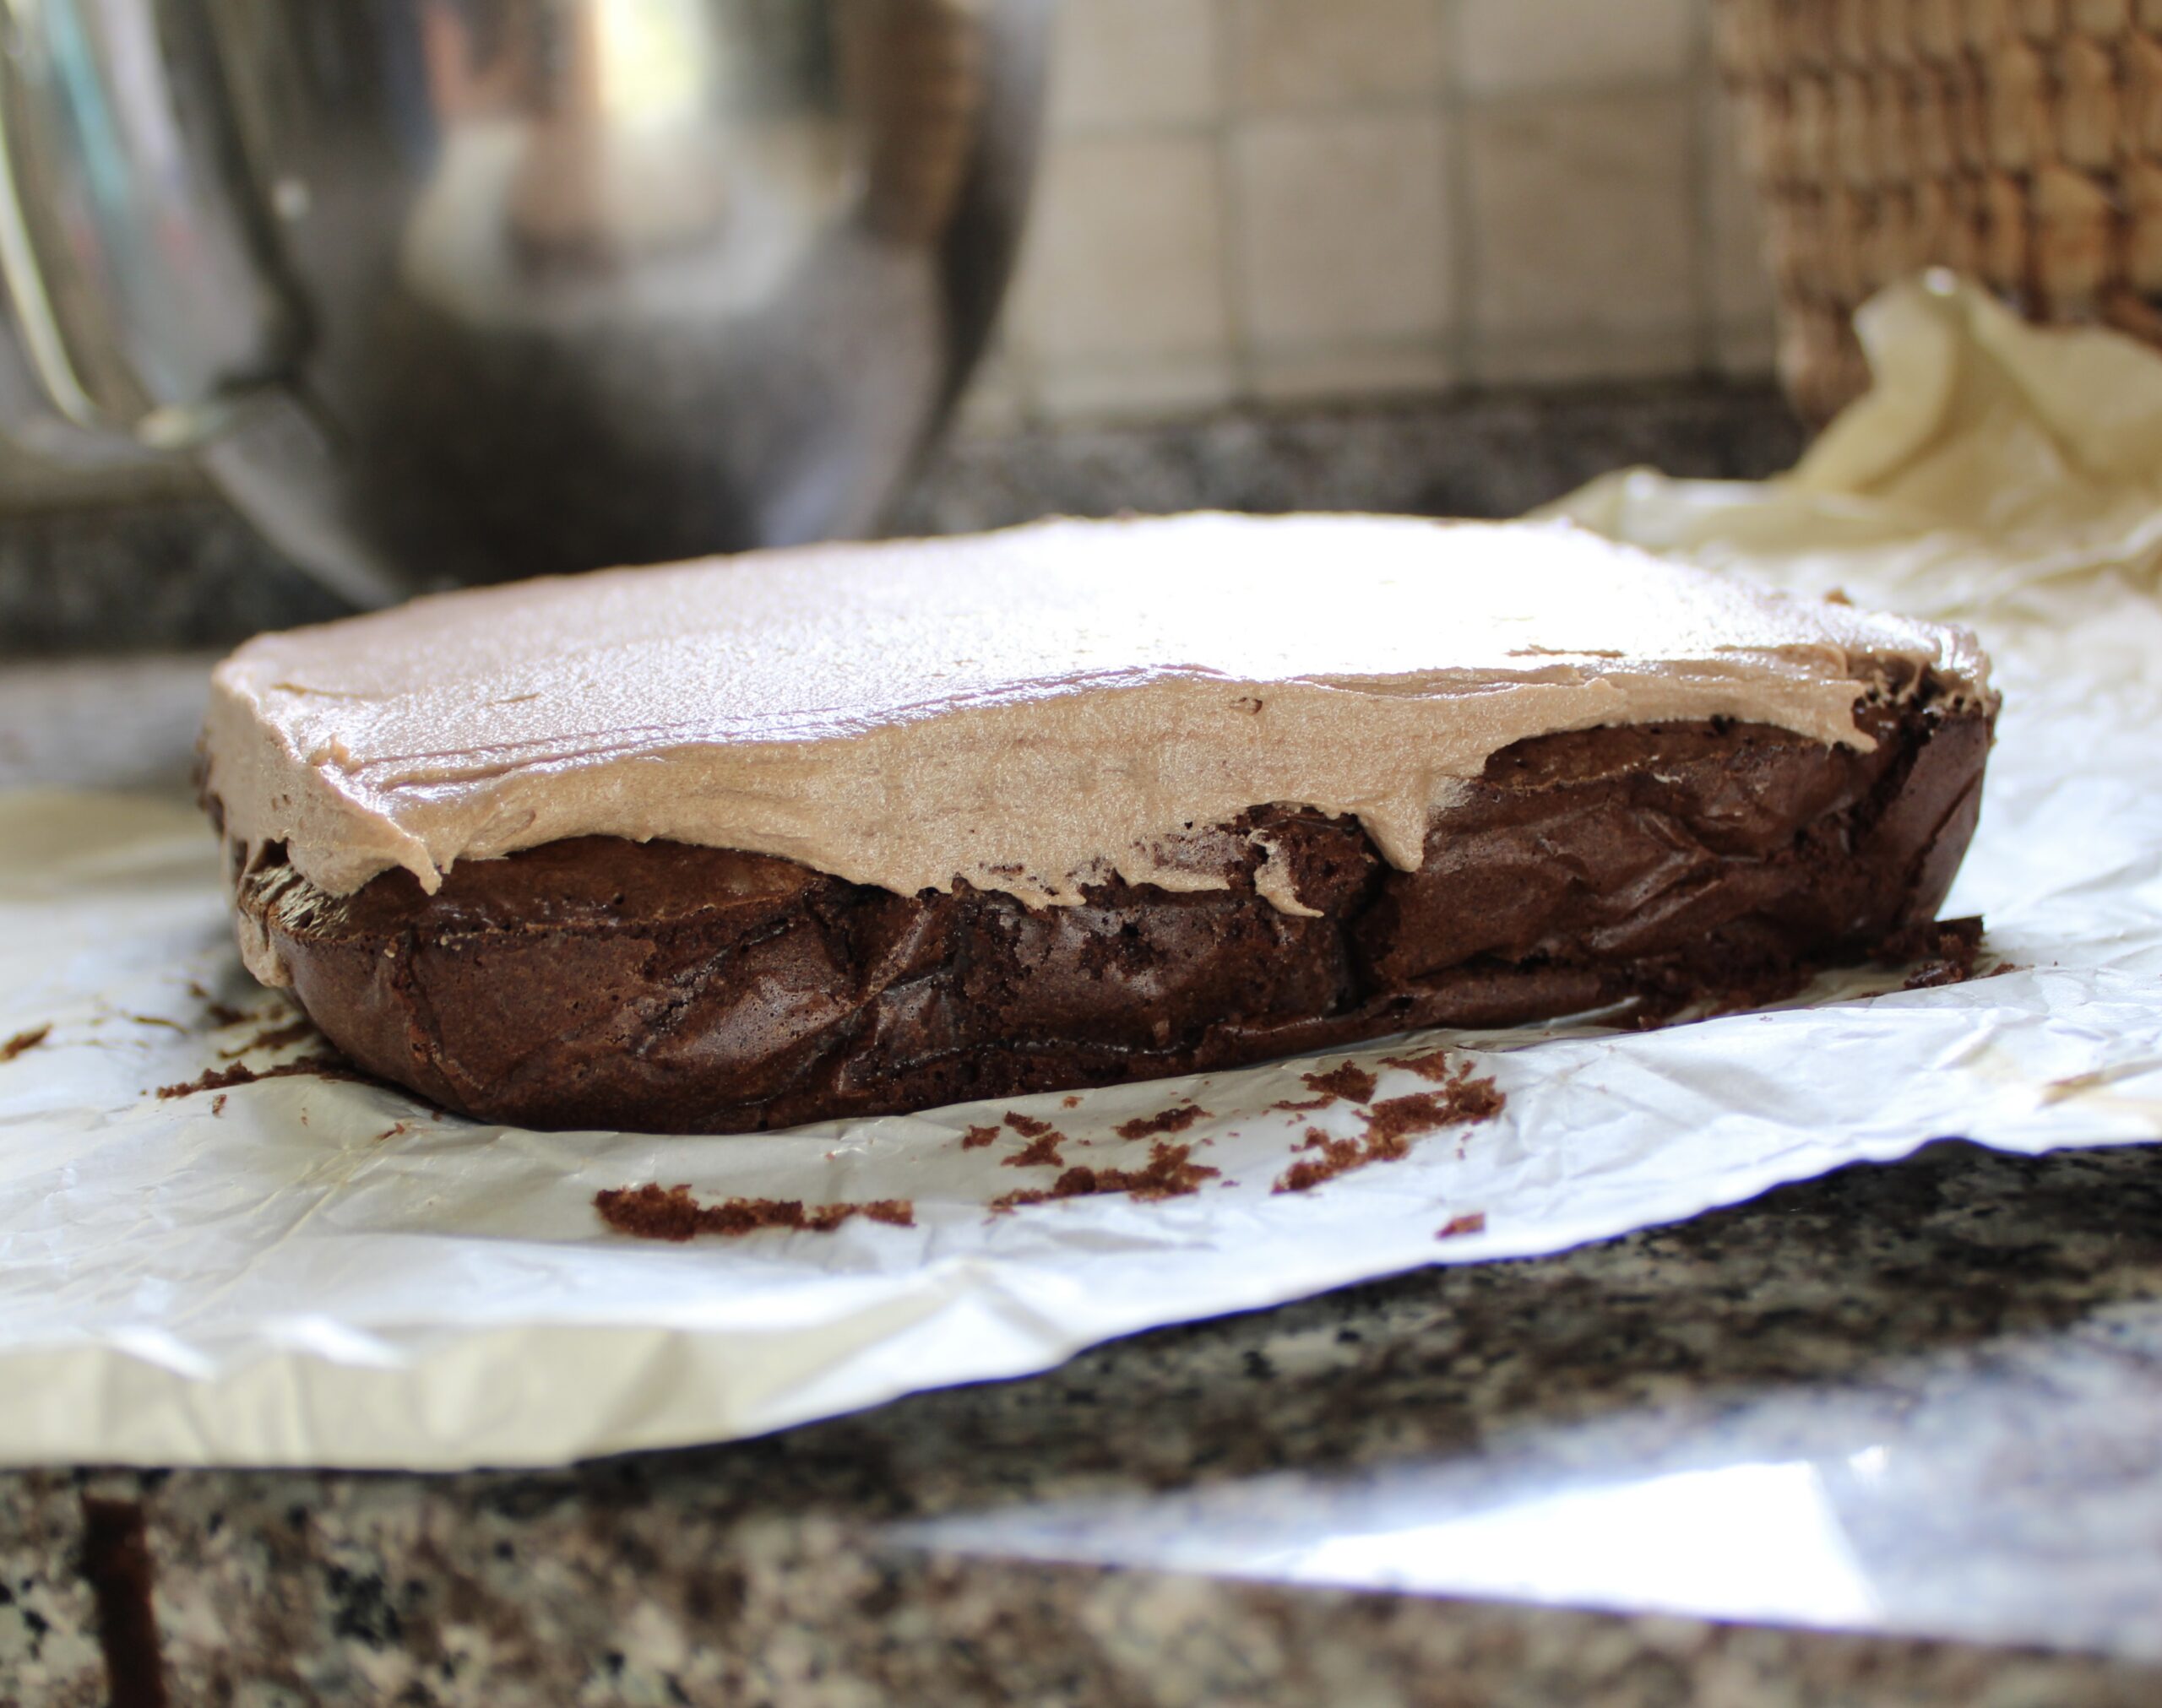
Spread this over cooled brownies, and prepare for compliments. This frosting alone is worth making the recipe for.
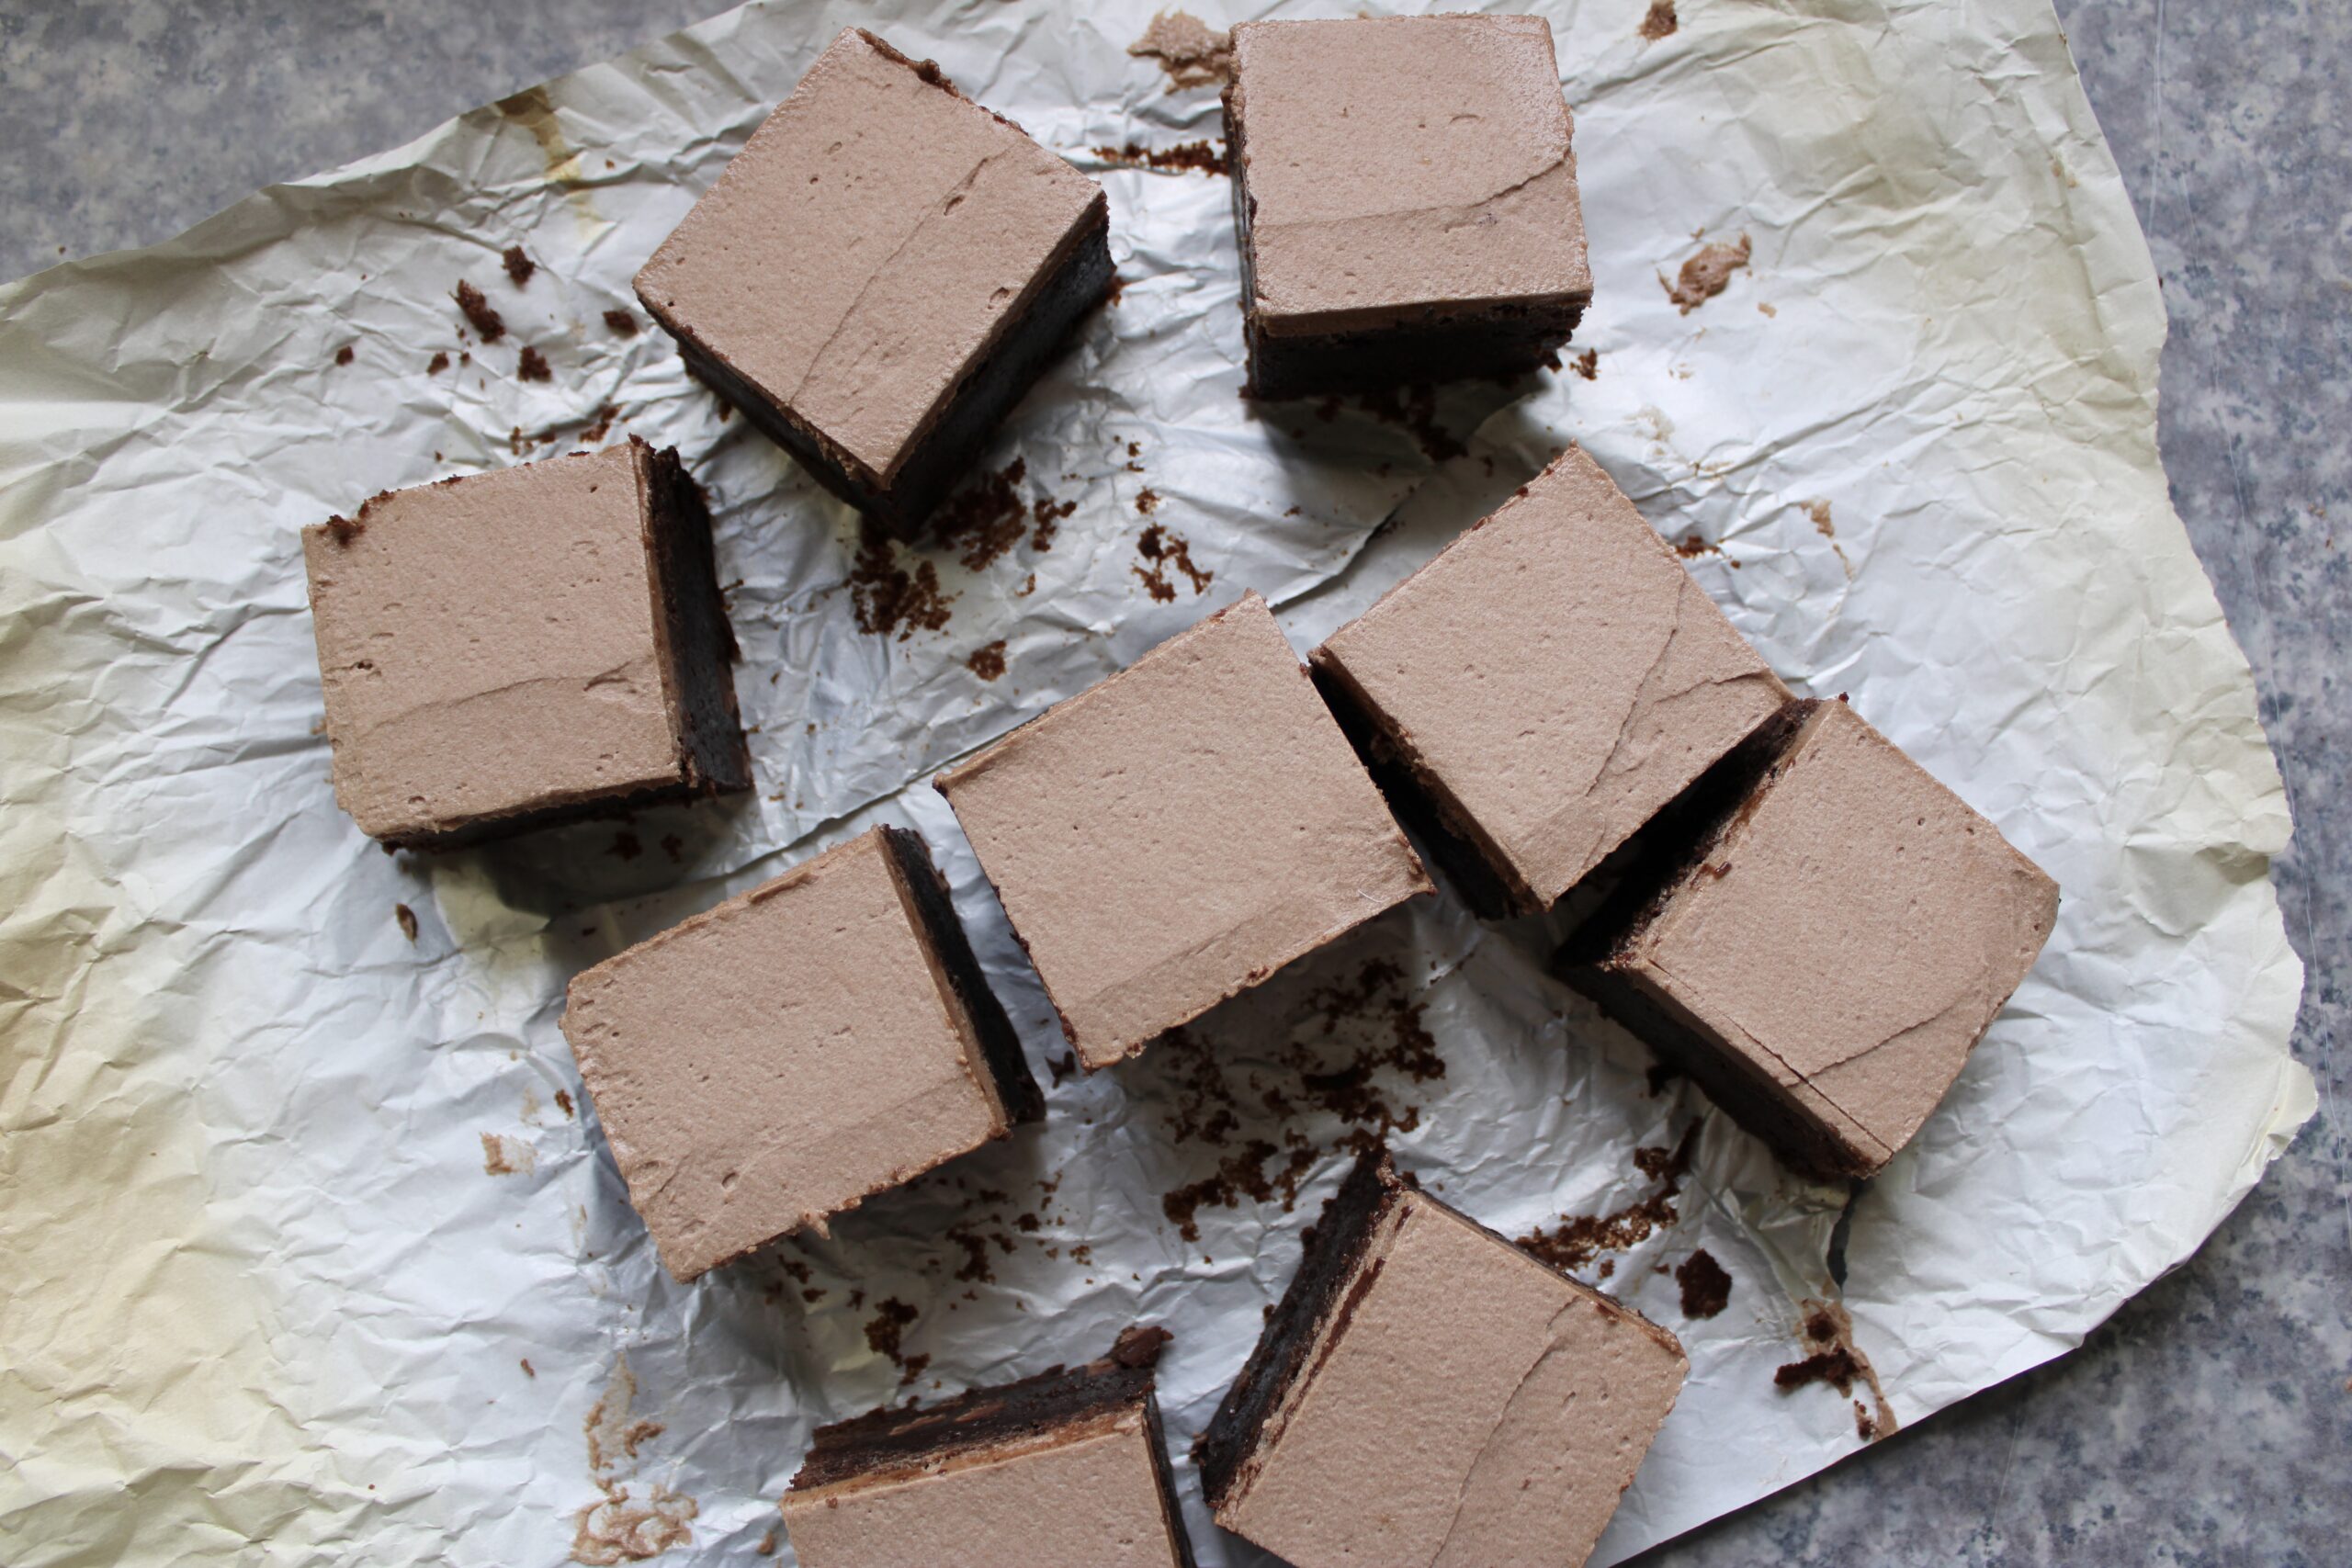
V. FROST AND CUT THE BROWNIES LIKE A PRO
How to Get Clean, Bakery-Perfect Cuts – The difference between homemade-looking and bakery-looking brownies comes down to how you frost and cut them. Here is the trick. Most people frost too early or cut with the wrong tool. Here is exactly how to make yours look like they came from a pastry case.
Finishing Techniques for Professional Results
- Wait until brownies are completely cool before frosting: Applying frosting to warm brownies causes it to melt and slide off, creating a messy appearance instead of the smooth, even layer that looks professionally finished.
- Use an offset spatula for even frosting distribution: Spread frosting from the center outward with long, smooth strokes, keeping the spatula at a low angle to create a flat, bakery-style finish without ridges or gaps.
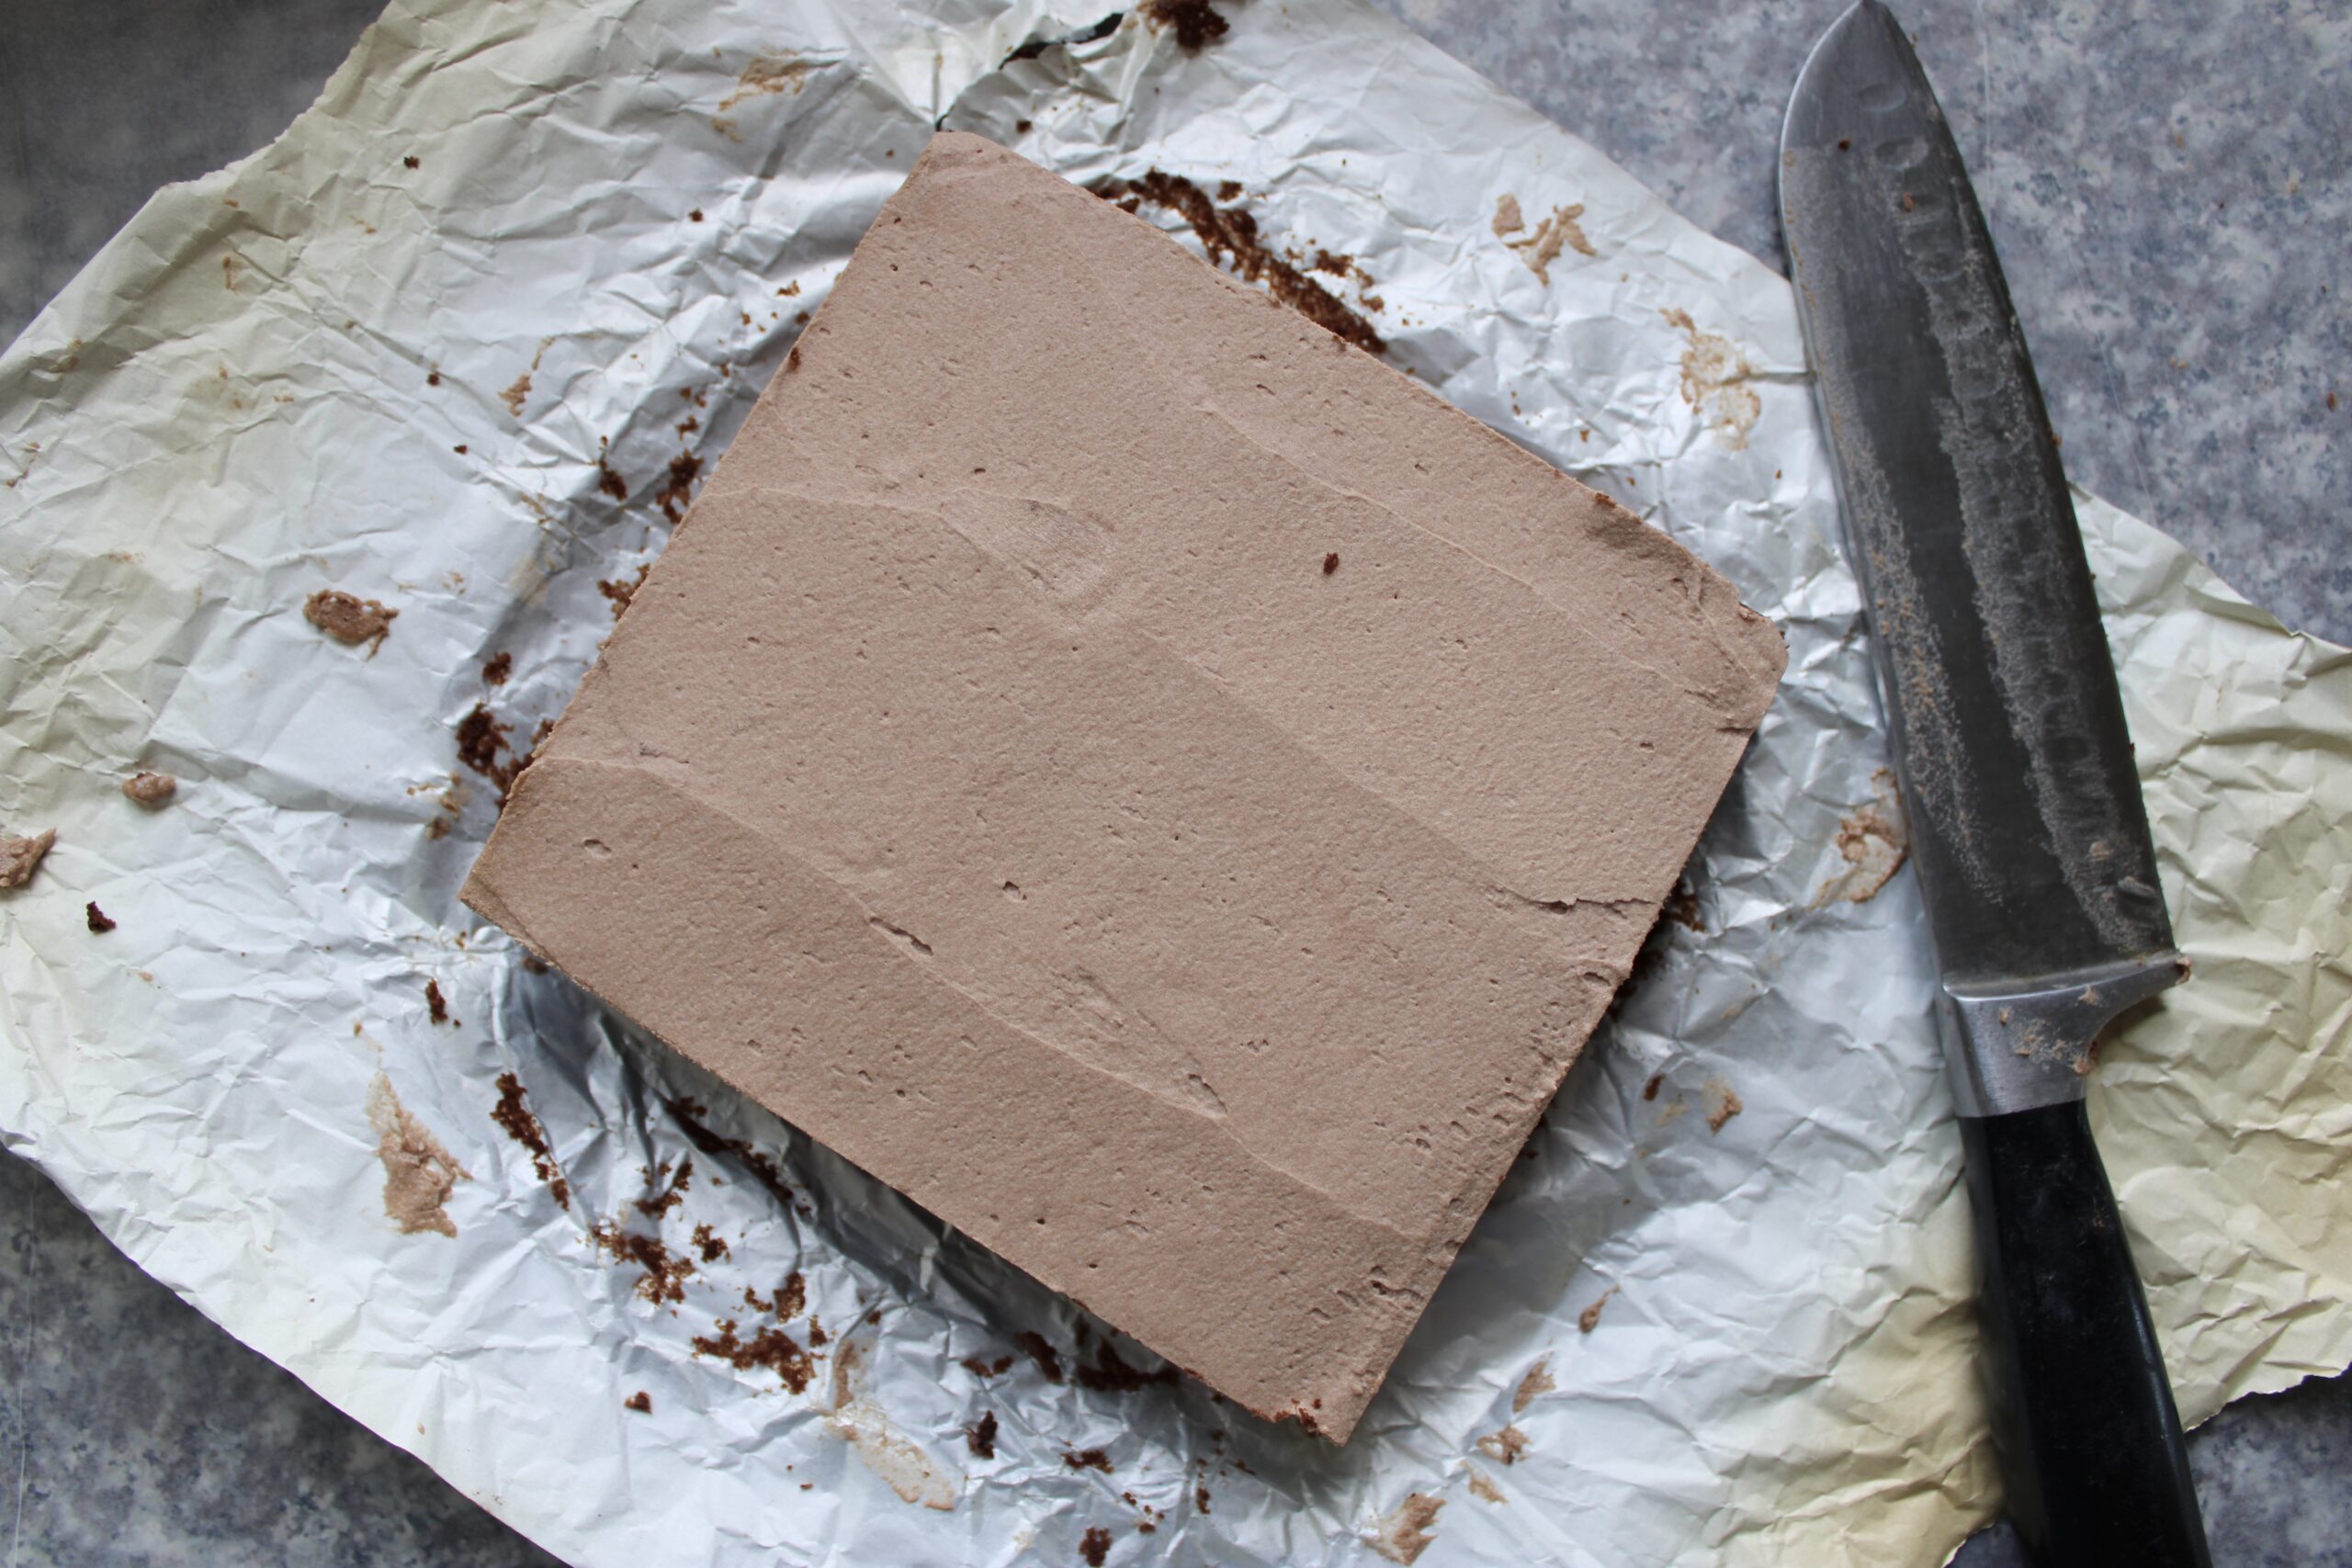
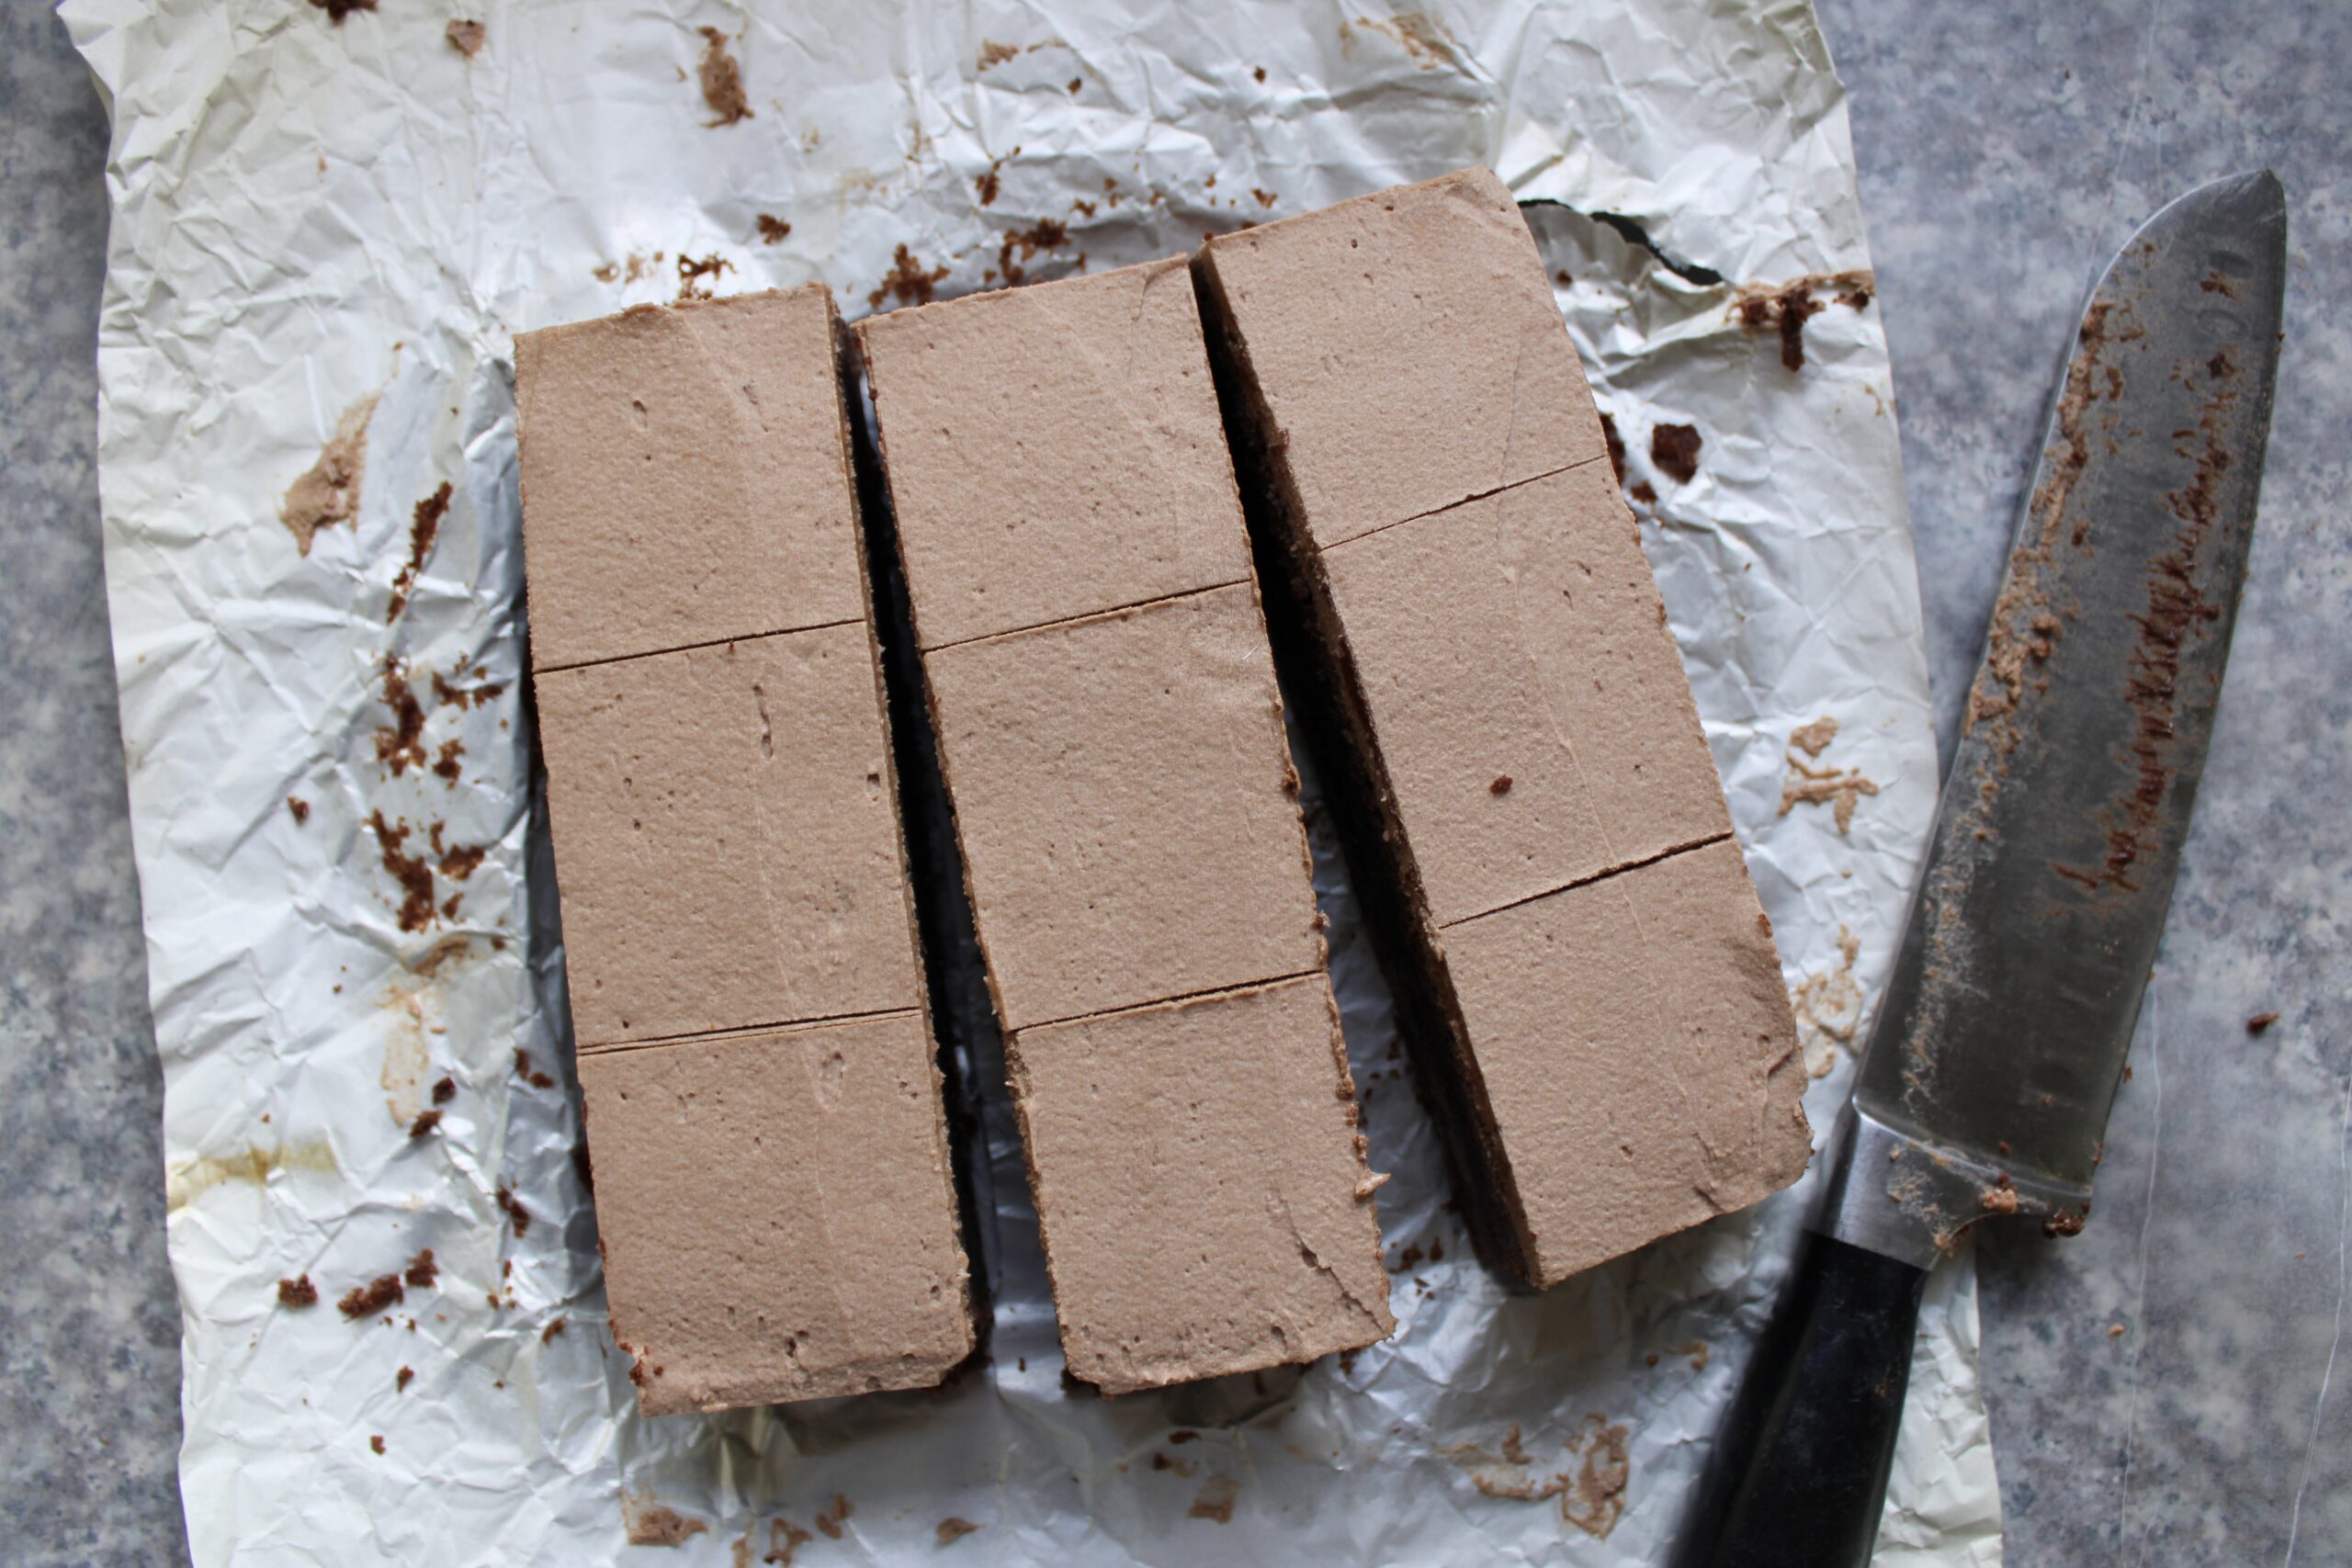
- Chill frosted brownies for 20 minutes before cutting: Refrigeration firms up the frosting and sets the brownie structure, allowing your knife to glide through cleanly instead of dragging frosting and creating jagged edges.
- Wipe your knife clean between every single cut: Use a tall glass of hot water to rinse your knife after each slice, then dry it with a towel, which prevents frosting and brownie crumbs from muddying subsequent cuts.
- Cut with a long, sharp chef’s knife using steady pressure: Avoid sawing motions that tear brownies apart, and instead press straight down with one confident motion, lifting straight up to preserve clean edges.
- Store cut brownies in an airtight container at room temperature: Layering parchment paper between stacked brownies prevents frosting from sticking, and airtight storage keeps them fudgy for up to five days.
If you do not have an offset spatula, a bench scraper held at a 45-degree angle creates equally smooth frosting with sharp, clean edges that look professionally piped.
- Freeze for Perfect Portions: Individually wrap cut brownies in plastic wrap and freeze for up to three months, then thaw at room temperature for two hours when cravings hit, giving you bakery-fresh brownies anytime.
- The Warm Knife Myth Debunked: Some recipes suggest warming your knife, but cold brownies with a room-temperature knife actually cut cleaner because the frosting stays firm and the blade does not stick to melted chocolate.
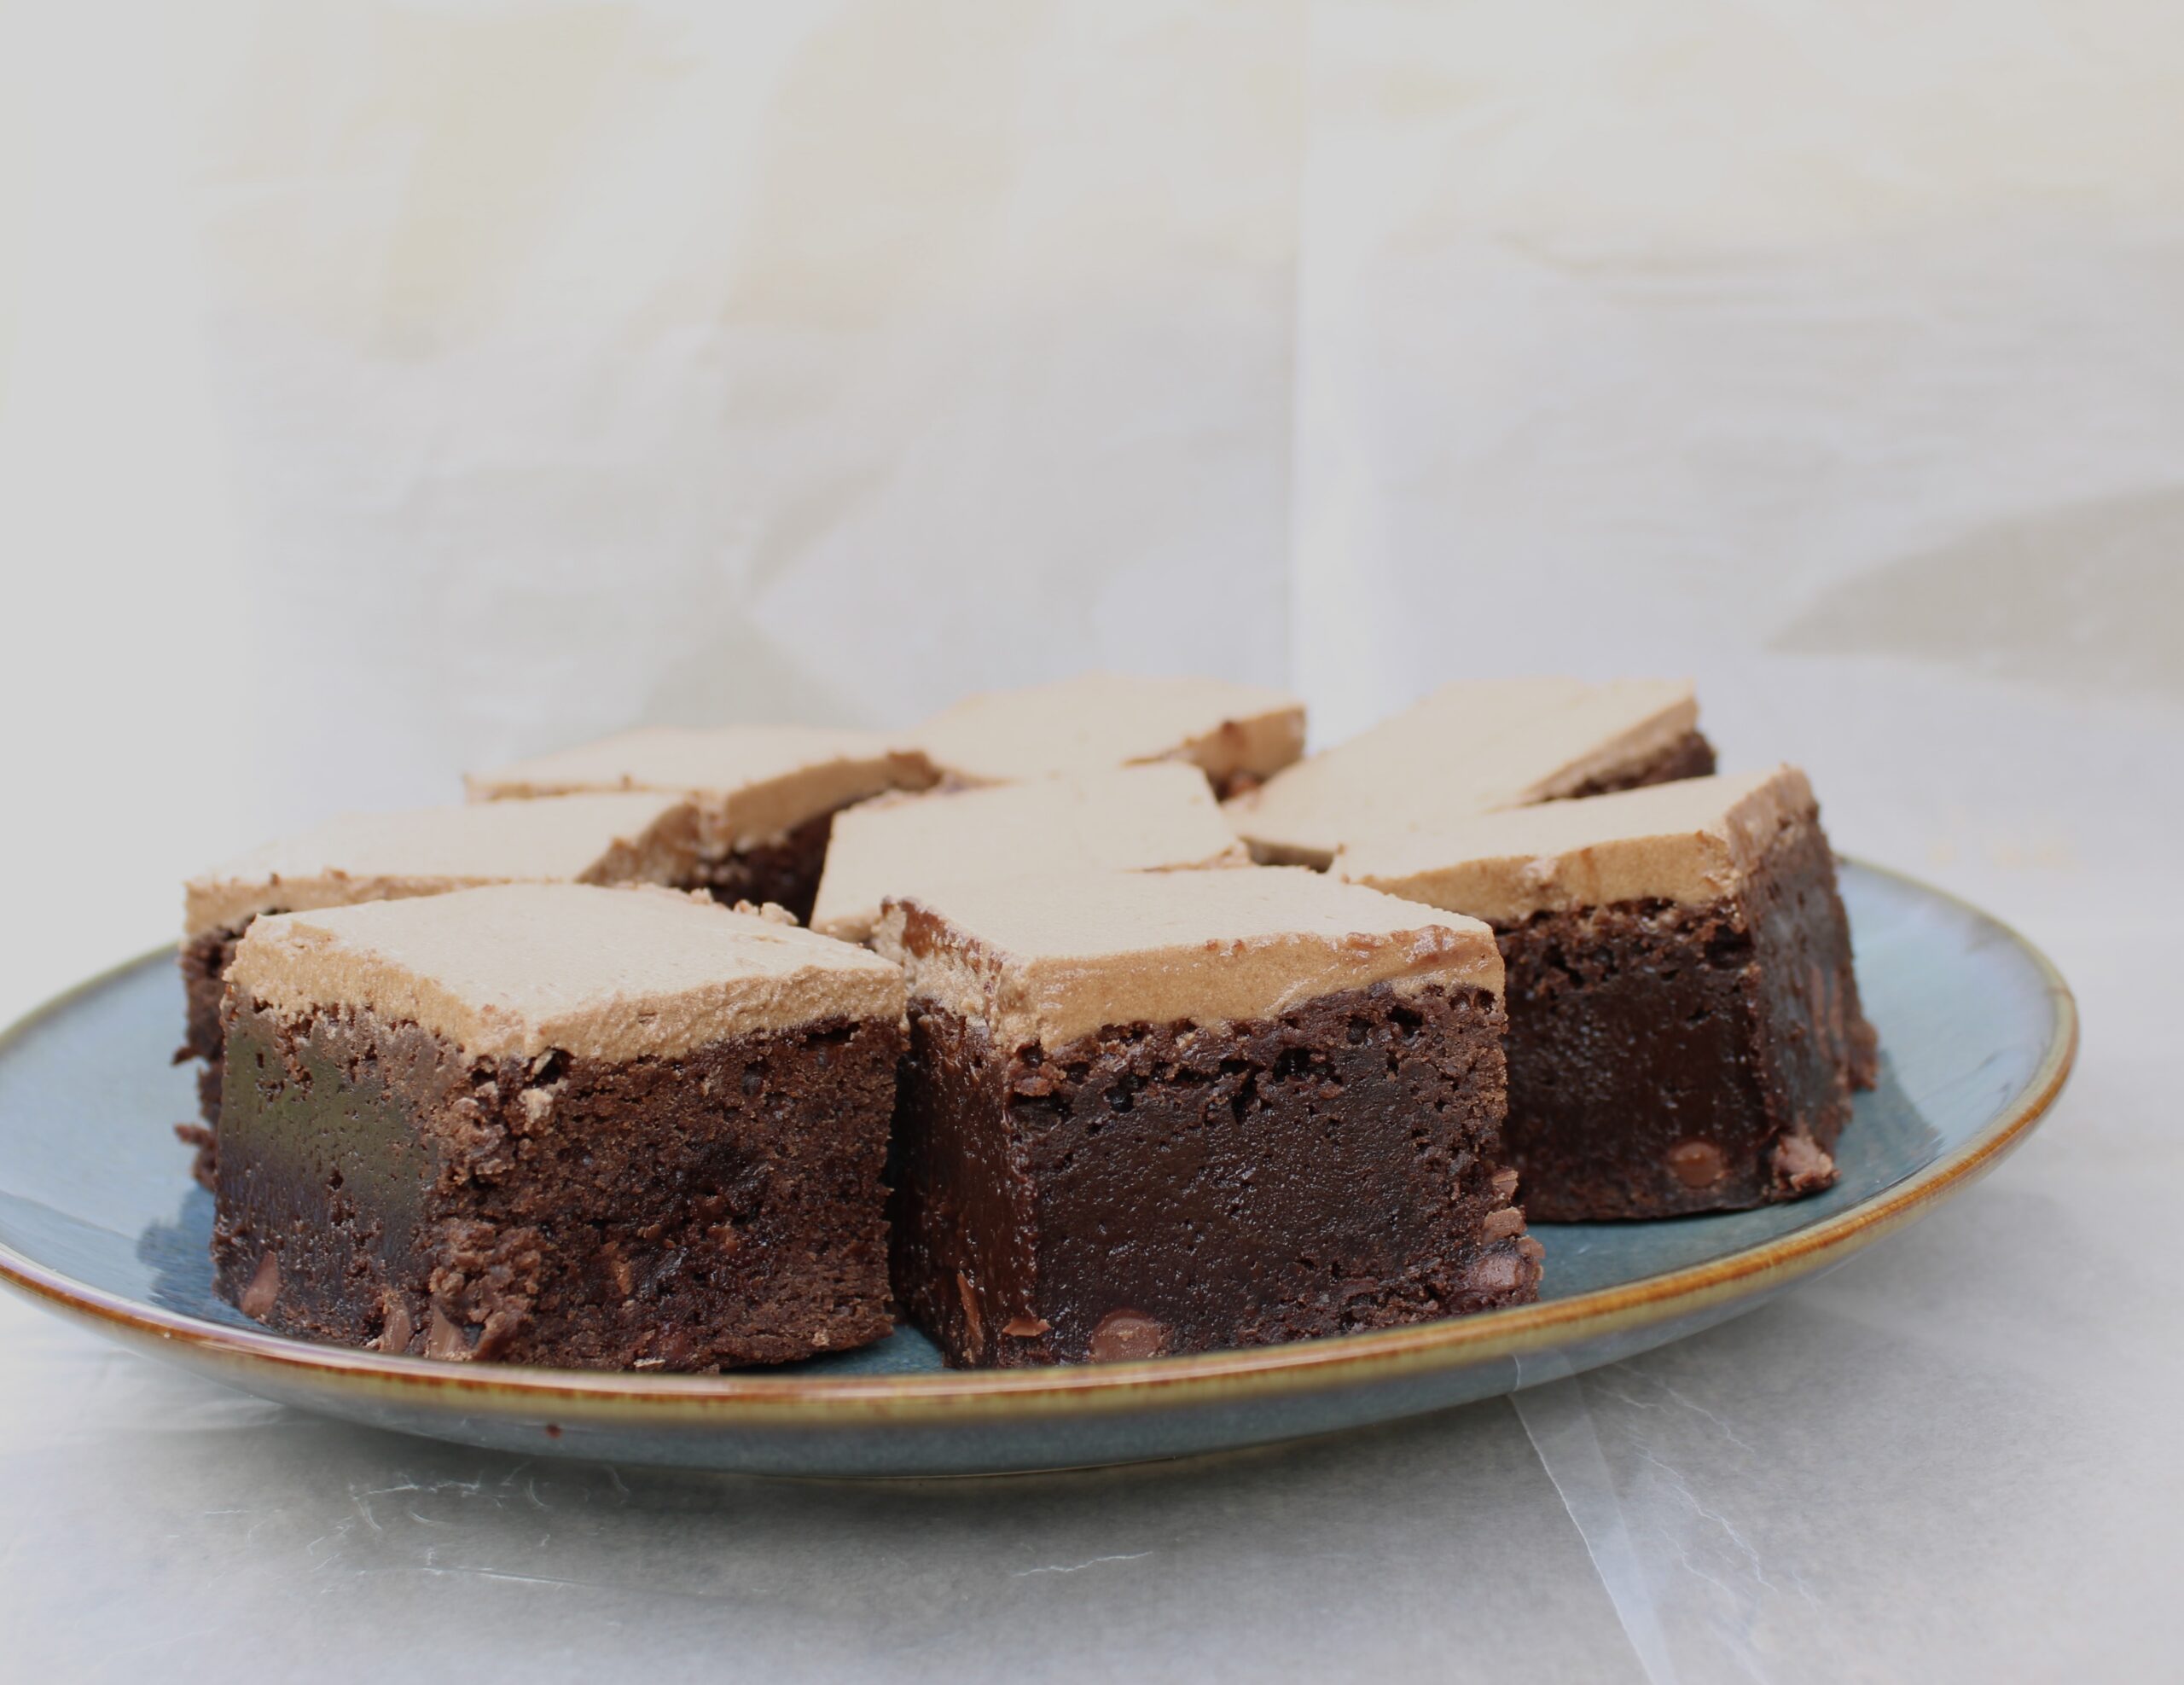
These brownies are proof that homemade beats store-bought every single time. Cut a square, grab a fork, and taste the difference.
VI. CUSTOMIZE YOUR MOCHA BROWNIES WITH CREATIVE TWISTS
Easy Upgrades for Next-Level Brownies – The best thing about this recipe? It is a blank canvas. Add any of these, and you have a whole new dessert every time.
Creative Customization Options
- Swirl in salted caramel for sweet and salty contrast: Drizzle three tablespoons of caramel sauce over the batter before baking, then use a knife to create swirls that add pockets of gooey sweetness with a salty edge.
- Add a layer of cream cheese for tangy richness: Beat eight ounces of softened cream cheese with sugar and an egg, spread it over half the brownie batter, top with remaining batter, and swirl for cheesecake brownies.
- Mix in crushed espresso beans for intense coffee crunch: Fold two tablespoons of finely crushed espresso beans into the batter for bursts of concentrated coffee flavor and a satisfying textural contrast.
- Top with flaky sea salt before baking: Sprinkle coarse sea salt over the batter right before it goes into the oven, which enhances chocolate flavor while adding a sophisticated, gourmet touch.
- Fold in chopped nuts for added texture: Walnuts, pecans, or hazelnuts add buttery crunch that contrasts beautifully with fudgy brownies, so fold in half a cup just before pouring batter into the pan.
- Drizzle with white chocolate ganache instead of frosting: Melt white chocolate with heavy cream, let it cool slightly, and pour over brownies for a sweeter, creamier alternative that looks stunning.
- The Peppermint Mocha Holiday Twist: Add half a teaspoon of peppermint extract to the frosting and sprinkle crushed candy canes on top for a festive version that tastes like your favorite coffee shop holiday drink.
- Double Espresso for Coffee Lovers: If you want an even stronger coffee flavor, double the espresso powder in both the brownie batter and the frosting without changing any other measurements.
Try one of these twists, or create your own. This recipe is foolproof enough to handle almost any addition you can think of.
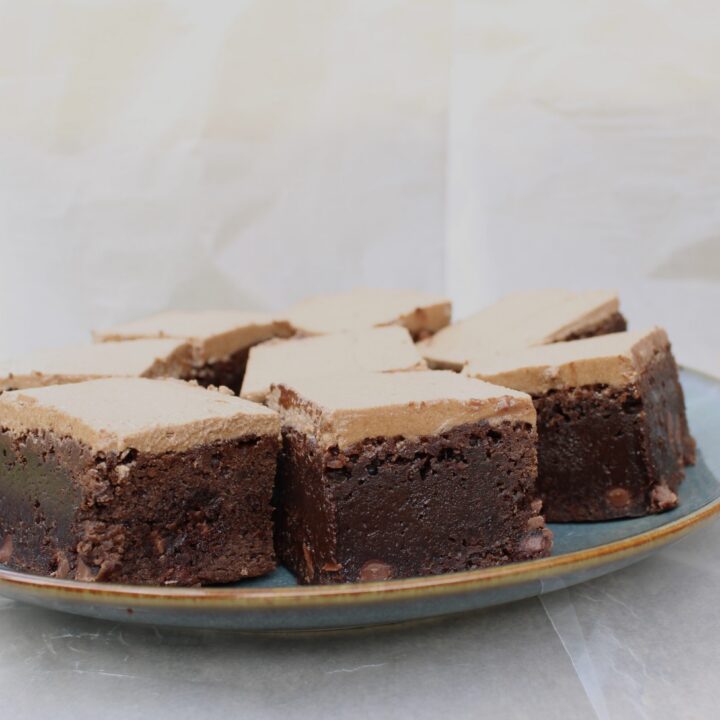
Mocha Brownies with Creamy Frosting
Rich mocha brownies topped with creamy mocha frosting, featuring a crackly top and fudgy center, for a bakery-style dessert.
Ingredients
- FOR THE BROWNIES-
- 1 box brownie mix
- 2 eggs + 1 extra egg yolk
- 115g (½ cup) melted butter (hot)
- 2 tbsp strong coffee
- 2 tsp instant coffee
- 1 tbsp hot water
- 2 tbsp cocoa
- ¾ cup chocolate chips
- FOR THE MOCHA FROSTING-
- 115g (½ cup) butter, softened (not melted)
- 2½–3 cups powdered sugar
- 2 tbsp cocoa powder
- 2 tsp instant coffee
- 1 tbsp hot water
- 2 tbsp heavy cream
- 1 tsp vanilla
- Pinch of salt
Instructions
Brownies:
Preheat the oven to 325°F and grease or line an 8x8-inch pan.
In a small bowl, dissolve the instant coffee in 1 tablespoon of hot water and set aside.
In a large bowl, whisk together the warm melted butter, eggs, and extra egg yolk vigorously for 1–2 minutes, until the mixture becomes smooth, glossy, and slightly thickened.
Add the brownie mix, cocoa, brewed coffee, and dissolved coffee mixture to the bowl, and stir gently until just combined, being careful not to overmix.
Fold in the chocolate chips, reserving a few to sprinkle on top if desired.
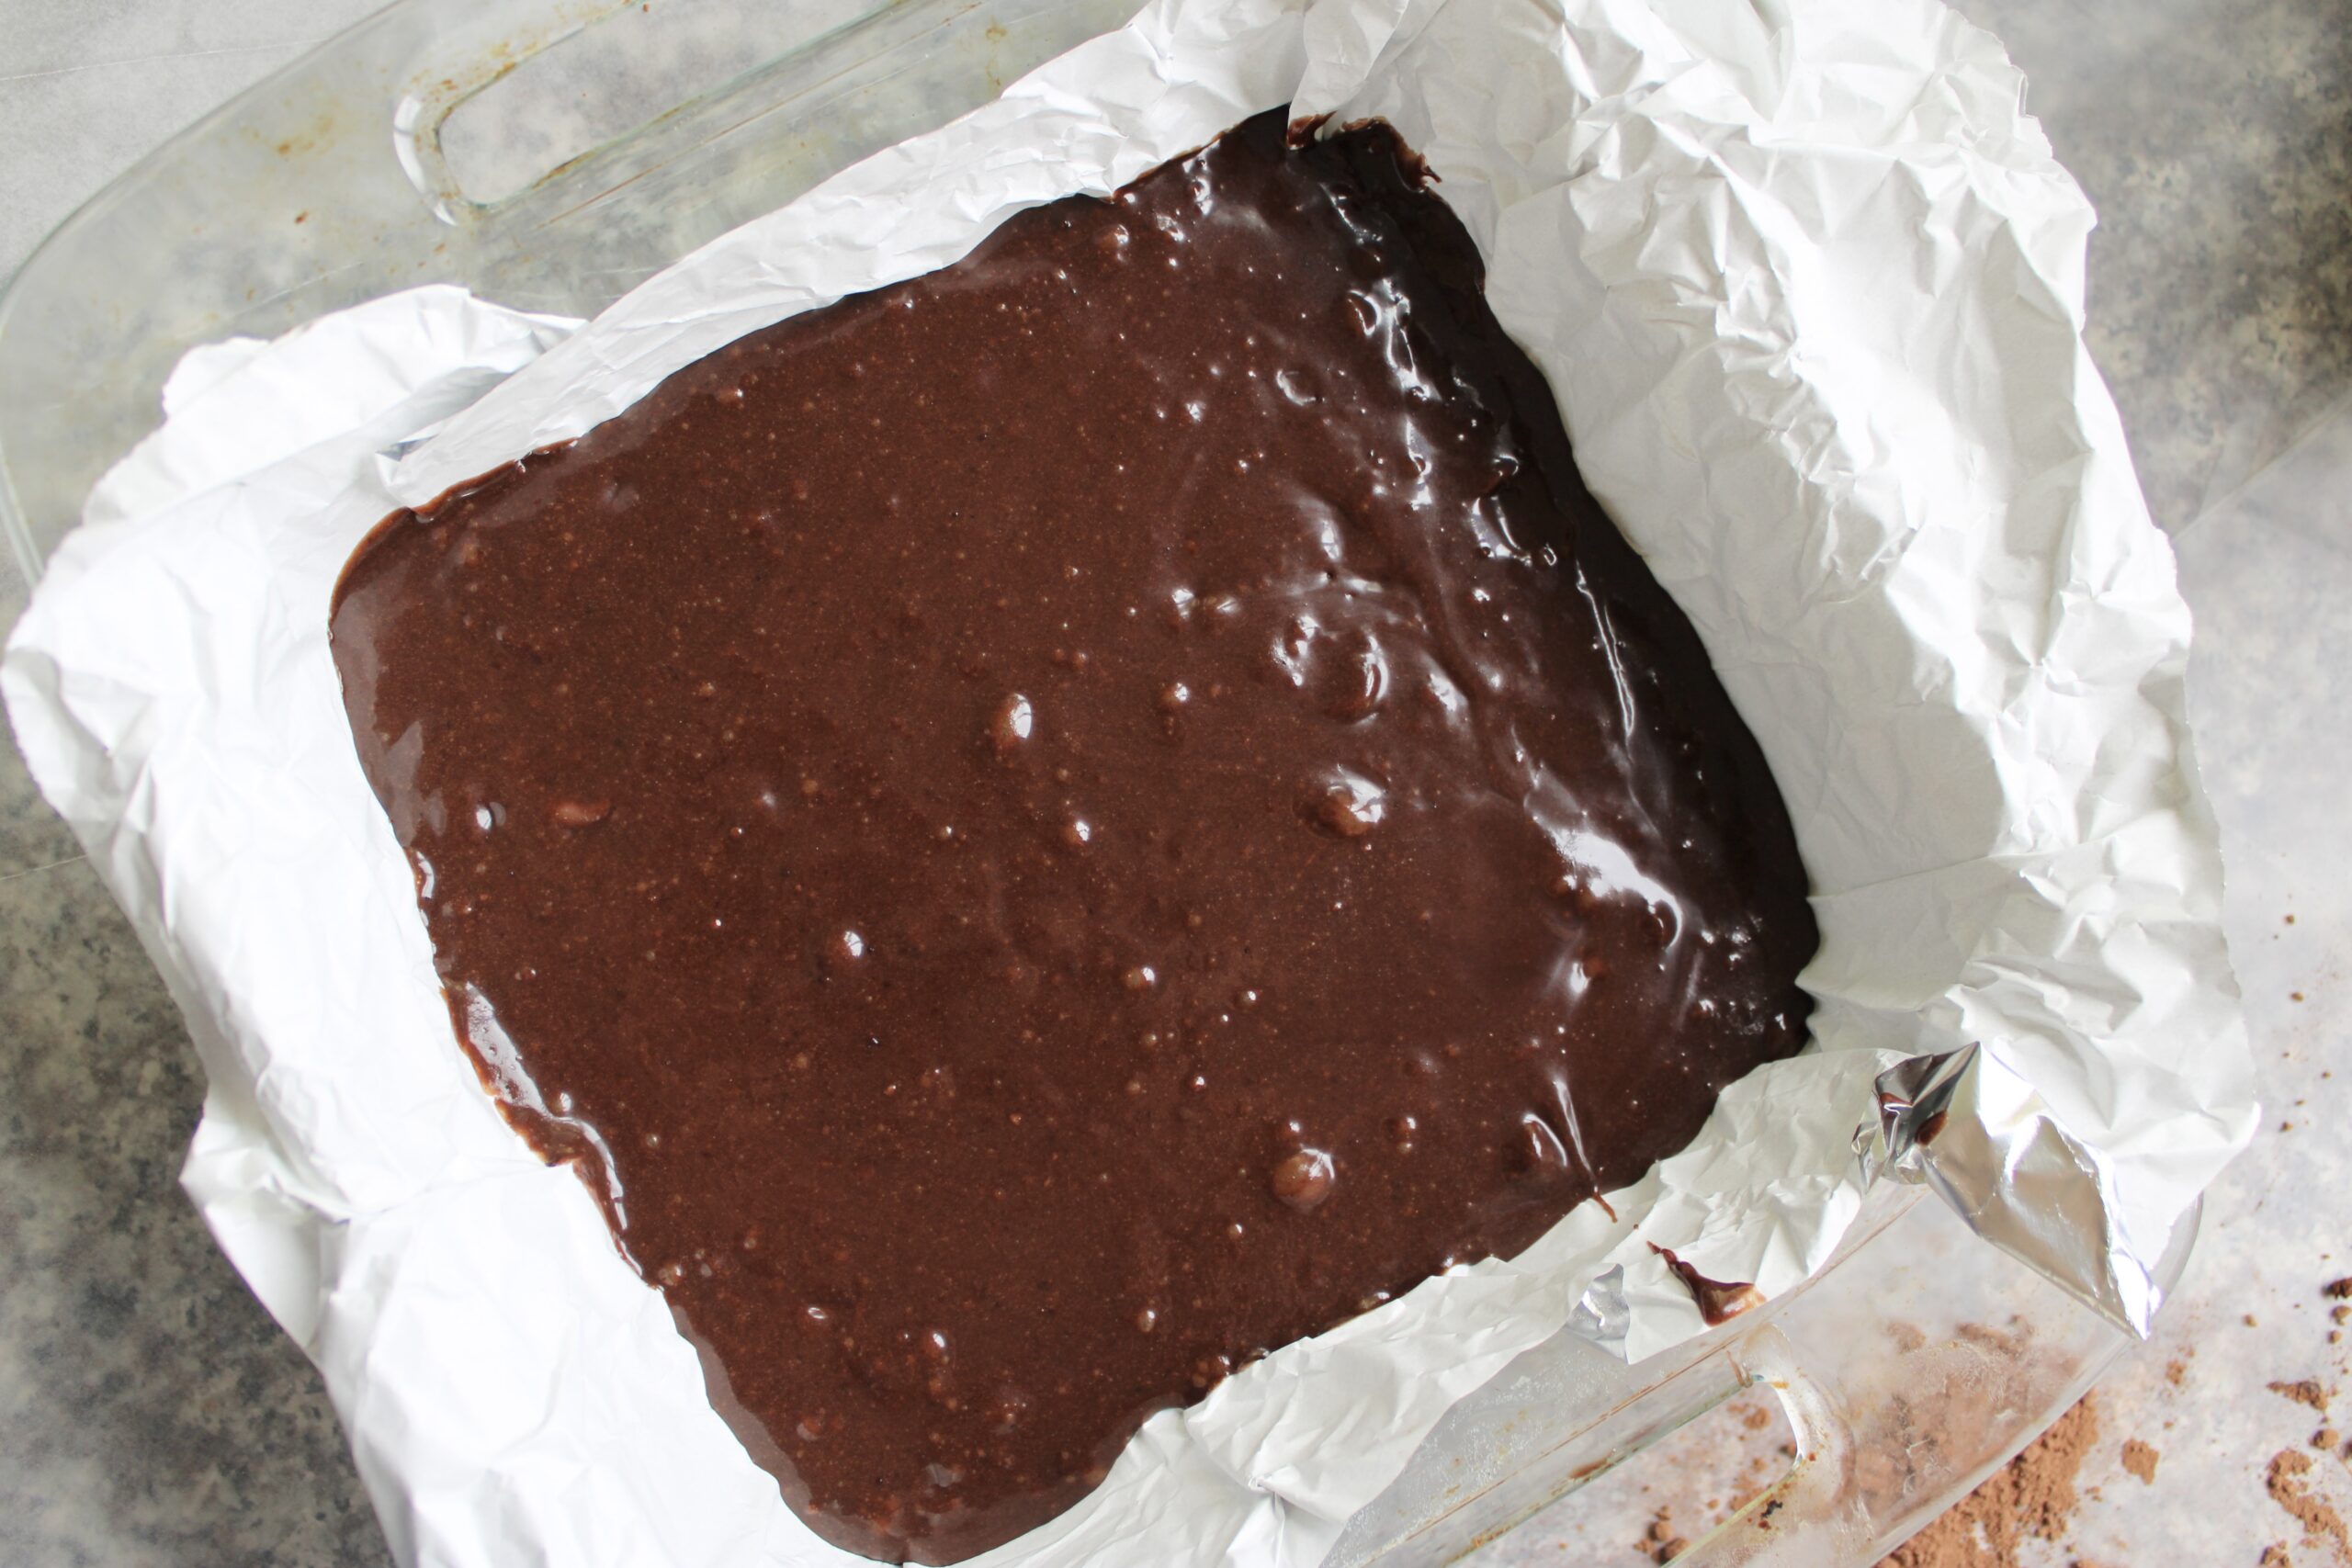
Spread the thick batter evenly into the prepared pan and smooth the top.
Bake for 28–32 minutes, until the edges are set and the center is still slightly soft, with a toothpick coming out with moist crumbs.
Allow the brownies to cool completely in the pan before slicing to achieve the best fudgy texture.
Frosting:
In a small bowl, dissolve the instant coffee in 1 tablespoon of hot water and set aside.
In a large bowl, beat the softened butter until smooth and creamy, about 1–2 minutes.
Add the cocoa powder and mix until fully incorporated.
Gradually add the powdered sugar, about 1 cup at a time, mixing well after each addition.
Pour in the dissolved coffee, vanilla, and a pinch of salt, and beat until combined.
Add the cream, one tablespoon at a time, and continue beating until the frosting becomes thick, fluffy, and spreadable.
Beat for an additional 1–2 minutes to make it extra light and airy.