How to Transfer a Design onto Wood
How to Transfer a Design onto Wood (the easy way!)

Have you ever wanted to make one of those cute signs, but you weren’t sure how to transfer a design onto wood?
Here’s how easy it is to transfer a design onto wood:
1. Print your design
Click HERE to print an 10″x8″
Click HERE to print a 15″x11″ (prints on 2 pages)

2. Rub plenty of chalk onto the back of the printed design

3. Shake the excess chalk off the design. Then place the paper print-side-up on your wood sign.
4. Using a ballpoint pen, trace over the design very firmly.


The pressure from the pen will press the chalk onto your wood sign! So easy!


5. Blow excess chalk off of your sign, then trace over the chalk with an oil paint marker.
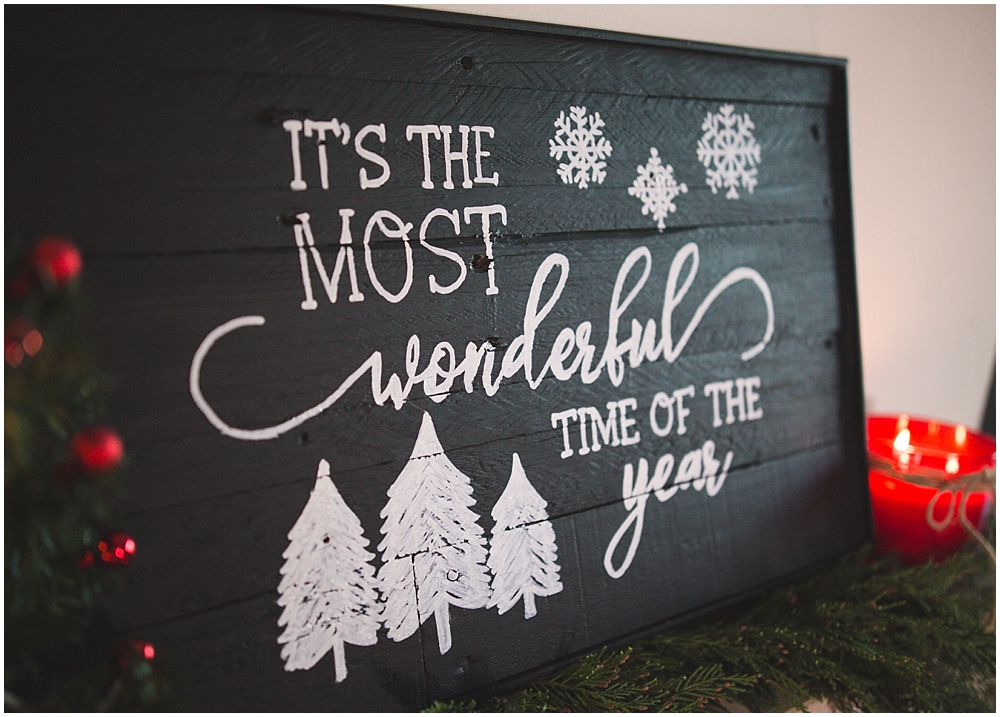
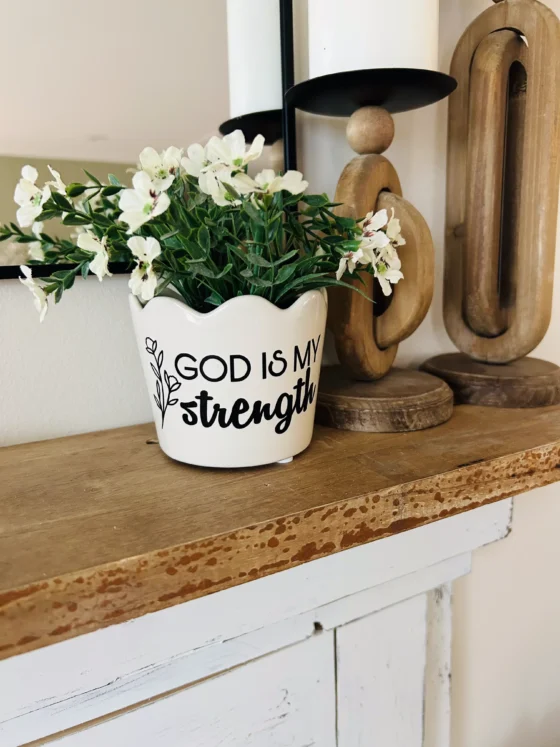
Painting wood signs is a great group craft, as well as an enjoyable quiet craft to do by yourself. Now that you know how to transfer a design onto wood, what are you waiting for? 🙂 Let’s make signs!


FLO SHEPHERD
April 11, 2020This was very interesting. I am starting to do Wood Pallet Signs, and I think since I don’t have a circuit machine to use, this might be another way. Do you know does this work on glass, cause I make Decorated Glass Blocks. Again thank you for a great idea.
Rachel Barkowski
April 12, 2020Hi! I’ve never tried it on glass, but I imagine the chalk would transfer nicely onto glass! Good luck! 🙂
Jennifer Harris
September 22, 2020Please send me vinage art sca
Heather
November 11, 2020Hey, you may have already learned this but you can get chalk transfer paper in the art department of the craft store. It’s way less messy and you can use the same sheet like 50 times. I’ve made over 1,000 signs this way. They also have carbon paper for lighter/ white signs. Your stuff is super cute.