
3D Paper Snowflakes – so easy to make and they make your house look so festive!

Here’s what you need to make this pretty snowflake craft – brown paper lunch bags, hot glue gun and hot glue, scissors, and some twine. Told ya it was easy 😉
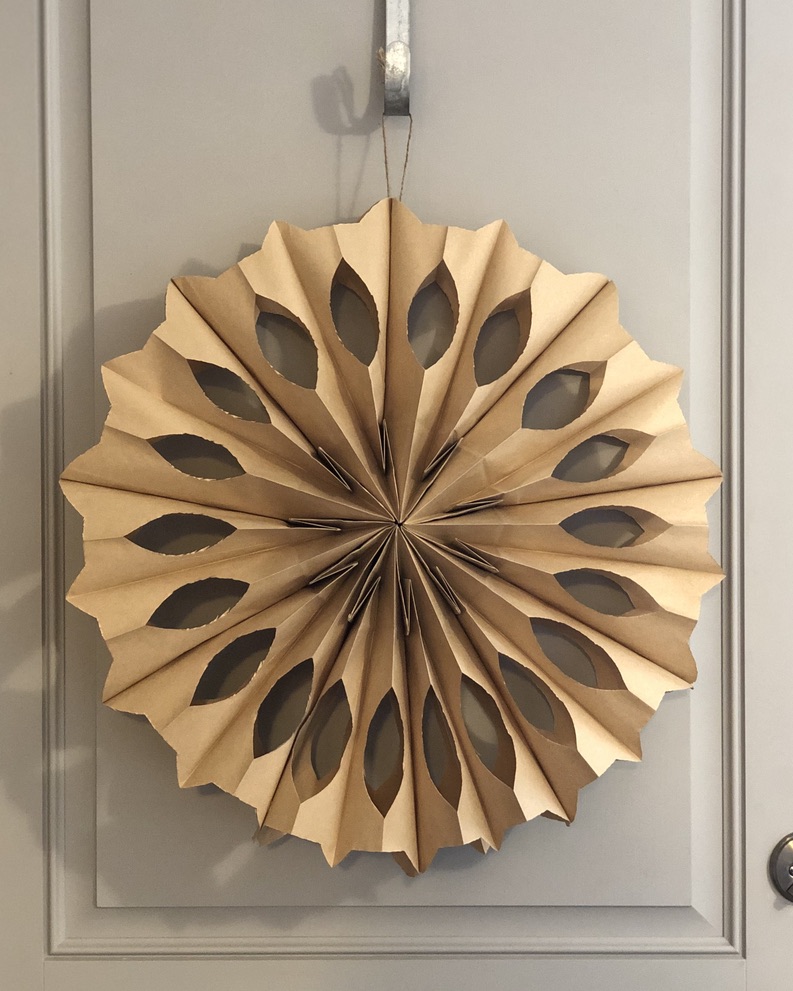
I love the look of these snowflakes because they’re simple but make such a statement. They spruce up any space and especially would look amazing for your Christmas party. You can hang them on the wall, or hang them on a door, or display them hanging from your pendant lights above the island! You can even make different sizes and layer them up for added dimension!
For this project, you will need:
- 8 paper bags
- hot glue gun and glue sticks
- scissors
- hole puncher
- twine or string for hanging
Here’s how to make your paper snowflakes:
- To start out, lay out 8 paper bags so they’re ready to glue together.
- You’re going to glue together your bags as shown in this video. Make a “T” with the hot glue – one line at the bottom and another line up the center.
- Stack another paper bag on top of that one and press down firmly to make sure the glue is holding them together. (Be careful, the heat can be felt through the bags!)
- Make another glue “T” on the bag as you did on the last one, stacking another bag on, and continue doing that until you have glued together your 8 bags.
- Now, it’s time to cut out your design out for your paper bag snowflake! You can either freehand cut or if you really want to make sure everything is perfect, you can draw your designs on. Make sure you have a good pair of scissors to cut since you’ll be cutting through 8 paper bags 😉
- When you have your design cut, make another glue “T” on the top of the paper bag and bring the two ends together to make the paper bag snowflake. Make sure you really hold them together firmly so the glue holds between the two bags.
- If you’re planning to hang your paper bag snowflake, you’re going to want to find whatever you want the top to be, use a hole punch to make a hole, string some twine or yarn through, and tie it to make a loop!
There it is! You’re finished with your paper bag snowflake 🙂
If you don’t want brown paper snowflakes, you can get white paper bags and use them to make white snowflakes. I think some spray glitter on the white paper bag snowflakes would be really pretty too 😉
I put mine up on either side of our tree in our front window 🙂

I absolutely love the creativity behind these 3D paper snowflakes! The step-by-step instructions are so easy to follow, and they add a magical touch to my holiday decorations. Can’t wait to try making them with my kids! Thank you for sharing such a fun project!
I absolutely love these 3D paper snowflakes! They look beautiful and are such a creative way to decorate for the winter season. Can’t wait to try making them with my kids – thanks for sharing the step-by-step guide!
These 3D paper snowflakes are absolutely beautiful! I love how easy the instructions are to follow. Can’t wait to try making them with my kids for the holidays! Thanks for sharing such a fun and creative craft idea!
I absolutely love this idea! The 3D paper snowflakes are such a fun and easy craft project to bring some winter magic into the home. Can’t wait to try these out with my kids! Thanks for sharing such clear instructions!
These 3D paper snowflakes are absolutely stunning! I love how simple yet elegant they look. Can’t wait to try making some for my holiday decorations. Thanks for sharing such a creative project!
I absolutely love these 3D paper snowflakes! The step-by-step instructions are so helpful and make the process feel so doable. I can’t wait to try making them with my kids for some holiday decorations. Thanks for sharing such a fun and creative idea!
I absolutely love these 3D paper snowflakes! The designs are so beautiful and creative—it really adds a magical touch to my winter decor. I can’t wait to try making some with my kids! Thank you for the clear instructions and inspiration!
These 3D paper snowflakes are absolutely stunning! I love how creative and easy-to-follow the instructions are. Can’t wait to try making them with my kids this holiday season! Thank you for sharing such a fun project!
I absolutely love these 3D paper snowflakes! They add such a festive touch to my holiday decor. The step-by-step instructions were easy to follow, and I can’t wait to try making them with my kids. Thank you for sharing this wonderful craft idea!
I absolutely love these 3D paper snowflakes! They are such a clever and beautiful way to add some winter magic to my home. The step-by-step instructions are super easy to follow. Can’t wait to try making them with my kids during our next crafting session! Thank you for the inspiration!